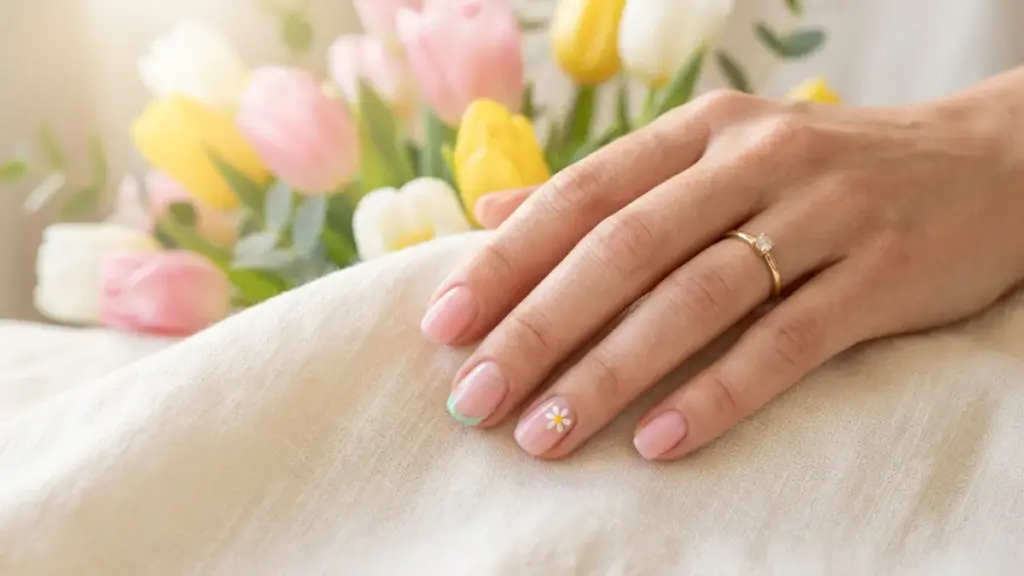
Hello, Spring! Your Go-To Guide for Easy Spring Nail Art Designs for Beginners (2026)
Ah, spring! The season of fresh blooms, gentle breezes, and (let’s be honest) a desperate craving for a manicure that actually matches the vibrant energy outside. If you’re searching for the ultimate easy spring nail art designs for beginners to try this year, you’ve officially landed in your happy place!
We’ve all been there: scrolling through gorgeous nail art on Instagram, feeling inspired, only to attempt a delicate floral design on our non-dominant hand and end up with a smudged, blurry mess. Total frustration, right? But don’t you worry, because this guide is specifically crafted for YOU. We’re here to help you achieve stunning, trend-setting spring nails right at home – no professional certification, impossibly steady hands, or a salon budget required!
Get ready to discover five distinct looks that perfectly capture the major 2026 aesthetics like charming Cottagecore, whimsical Coquette, and subtle Quiet Luxury. Best of all? Every single design is surprisingly simple to apply, even if you consider yourself a nail art novice. Let’s make your nails bloom!
What Are the Hottest Easy Spring Nail Art Trends for 2026?
When it comes to springtime manis, especially for us beginners, the focus is all about looks that are easy, quick, and deliver serious visual impact without requiring advanced brush acrobatics. For 2026, we’re seeing a beautiful shift away from super chunky embellishments and towards a sophisticated “soft dimension.”
Think of it as the effortless charm of the Clean Girl aesthetic mingling with a touch of playful whimsy. We’re embracing elegant negative space, delicate placements, and smart ways to use beginner-friendly tools like a simple dotting tool or even clever household items. The aim? A manicure that looks utterly polished and artistic, yet feels totally effortless to achieve yourself. If you love staying on top of what’s new, make sure to check out the latest Nail Art Trends for 2026!
Why These Spring Looks Are Perfect for Beginners
You might be tempted to just stick to a single pastel color, and while there’s nothing wrong with that, trying actual designs is so much more rewarding! Here’s why diving into these simple seasonal manicures is your best next step on your DIY nail art journey:
- Instant Confidence Booster: There’s nothing quite like the rush of accomplishment when you create a clean design, even a tiny one. It’s the perfect antidote to that nagging “I can’t do nail art” voice in your head.
- Low Stakes Experimentation: We all make mistakes! If you mess up a tiny daisy or a subtle swirl on one nail, it’s incredibly easy to wipe it off and start fresh without redoing your entire hand.
- Embrace 2026 Aesthetics Effortlessly: The top nail trends this year – Cottagecore (think dainty flowers), Coquette (hello, pearls!), and Quiet Luxury (subtle sheers) – are all inherently beginner-friendly when broken down into simple steps. Want more office-approved minimalist looks? Check out our Professional’s Guide to Minimalist Nail Art.
- Minimal Tool Investment: You absolutely do not need a salon’s worth of equipment. Many of these stunning looks require just one or two very inexpensive basic tools or polishes. In fact, many of our easy nail art designs for beginners can be done with items you already own!
Pro Tip from a Nail Enthusiast: Seriously, don’t sweat making every nail perfectly identical. The beauty of these hand-painted designs is their unique, organic feel – which, by the way, is totally in vogue!
What You Need for Your DIY Spring Manicure (Affiliate Picks!)
Before we jump into these gorgeous designs, let’s make sure your nail art station is perfectly prepped. While specialized tools definitely help, we’re all about minimizing the need for complex gear. Get these basics ready:
- Prep Power Players: A good quality nail file, buffer, and cuticle pusher are non-negotiable for a long-lasting mani. Seriously, proper prep makes all the difference! (If you’ve ever wondered why Polygel nails lift or struggled with durability, advanced prep tips are key!)
- Base and Top Coats: A ridge-filling base coat works wonders for sheer polishes, and a high-gloss top coat is crucial for sealing your art perfectly and adding that professional shine.
- Your Perfect Polish Palette: For spring, you’ll want a sheer nude or milky white base color, plus 2-3 delightful pastel shades (think soft butter yellow, fresh mint green, and delicate lavender).
- Key Beginner Tools (Our Top Recommendations!):
- A versatile dotting tool set (essential for flawless dots and flower centers!) or, in a pinch, a wooden toothpick or the ball tip of a bobby pin.
- A fine liner brush for simple swirls and delicate lines. Psst, want to invest in a great set? Check out our guide to the Best Nail Art Brushes for Beginners.
- A makeup sponge if you’re venturing into soft ombre looks.
- And if you’re looking for that trending “glazed donut” or “glass nail” effect, some pearlescent chrome powder and a no-wipe gel top coat are must-haves. You’ll also need a mini UV/LED lamp to cure gel products.
Alright, let’s dive into five stunning, totally doable looks. We’ve ranked these by difficulty so you can build your skills with confidence!
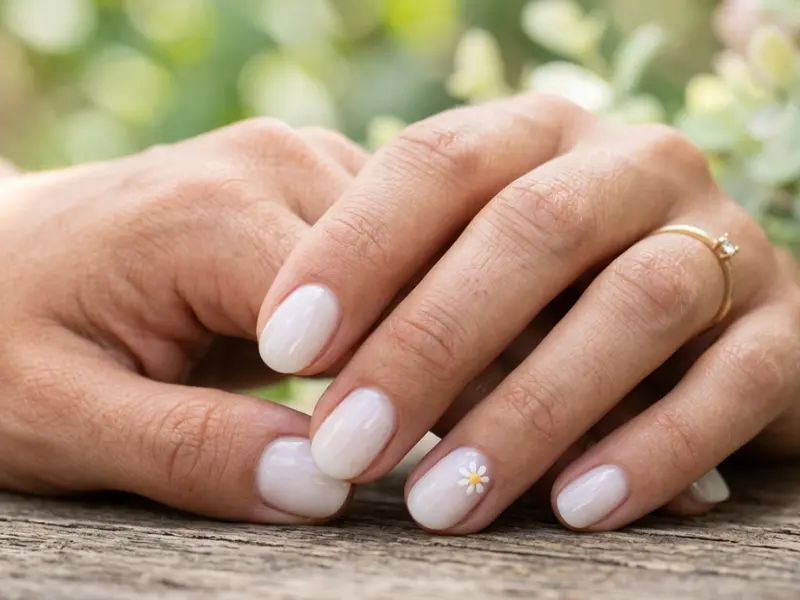
1. The Micro Daisy Accent (Cottagecore Chic!)
This is your ultimate Cottagecore starter pack, reimagined for 2026. We’re keeping it super fresh by only accenting one or two nails, giving a delicate touch rather than overwhelming every finger.
- Prep & Base: Shape your nails beautifully and apply your trusty base coat. Once dry, apply two thin coats of a sheer, milky white polish. Let each coat dry completely.
- Dot the Center: Using your smallest dotting tool (or a toothpick!), pick up a tiny drop of pastel yellow polish. Place one single, neat dot near the base of your accent nail.
- Create Petals: Clean your dotting tool, then pick up white polish (or a different pastel color for contrast!). Gently place 5-6 tiny dots around the yellow center, making sure they just touch the center dot to form your adorable daisy.
- Seal the Deal: Once your tiny daisy is completely dry, seal your masterpiece with a glossy top coat.
2. Pastel French Tip Outline (Quiet Luxury Vibe)
This elegant twist on the classic French tip is pure Quiet Luxury. Instead of a full, thick tip, we’re using a super thin outline, making it surprisingly easy to execute perfectly. If you want to master the basics, check out our full guide on how to do French tips for beginners.
- Base Layer: Apply your base coat, then two coats of a very sheer, healthy-looking pink or nude polish. You want your natural nail peeking through subtly.
- Paint the Smile (Line!): Dip your fine liner brush (remember, thin is in!) into your favorite spring pastel – think delicate mint green, soft baby blue, or sunny butter yellow. Gently trace the natural “smile line” where your free edge begins. Don’t worry about perfection; a thin line forgives wobbles far better than a thick one!
- Add a Second Line (Optional Flourish): Feeling confident? Trace another ultra-thin line just below or parallel to the first one for a chic double-outline effect.
- Seal it: Once your pastel lines are completely dry, finish with a high-gloss top coat to protect and shine.
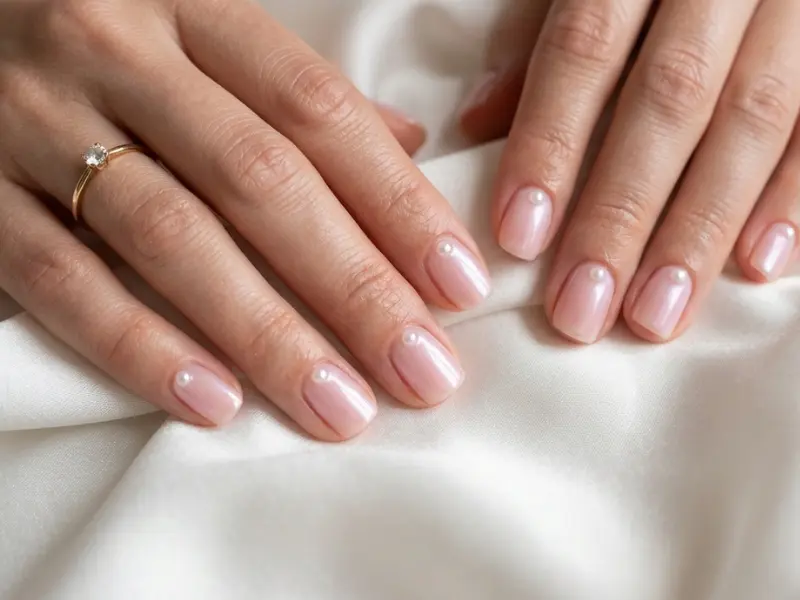
3. The Negative Space Pearl (Coquette Core)
This Coquette-inspired look is all about elegant placement rather than intricate painting skills. It’s unbelievably fast, super chic, and embraces the power of negative space nail art for beginners.
- The Sheer Base: Apply your base coat and then just one coat of a sheer pearl or milky white polish. The idea here is to keep the design feeling light and airy, letting your natural nail shine through.
- Place the Pearl: While your polish is still slightly tacky (or with a tiny dab of top coat as glue for extra security), use a wax stick or fine-tipped tweezers to carefully pick up one tiny, flat-backed pearl. Place it delicately near the cuticle of each nail, or just on your accent nails.
- Encapsulate & Secure: Gently apply a generous layer of your favorite top coat directly over the pearl to securely lock it in place and give it a smooth finish.
4. Simple Pastel Swirls (Abstract Art, Simplified)
This look offers a soft, abstract dimension that’s surprisingly easy to achieve. The secret? Let your brush do the talking and don’t overthink symmetry. It’s all about organic, flowing lines!
- Base Prep: Apply your base coat and your chosen base color (a sheer nude or soft light pastel works beautifully here).
- The First Swirl: Dip your fine liner brush into a contrasting pastel color. Place the brush tip gently near one edge of your nail and smoothly drag it in a graceful “S” curve across the nail. Keep your pressure feather-light – this helps create that delicate, wispy look.
- Add Dimension with Another Color: For extra visual interest, add another, shorter swirl starting from a different edge of the nail using a second complementary pastel color.
- Gloss & Blend: Once your swirls are dry, apply a generous top coat. This not only adds shine but also helps to subtly blend the edges of your swirls, giving a seamless finish.
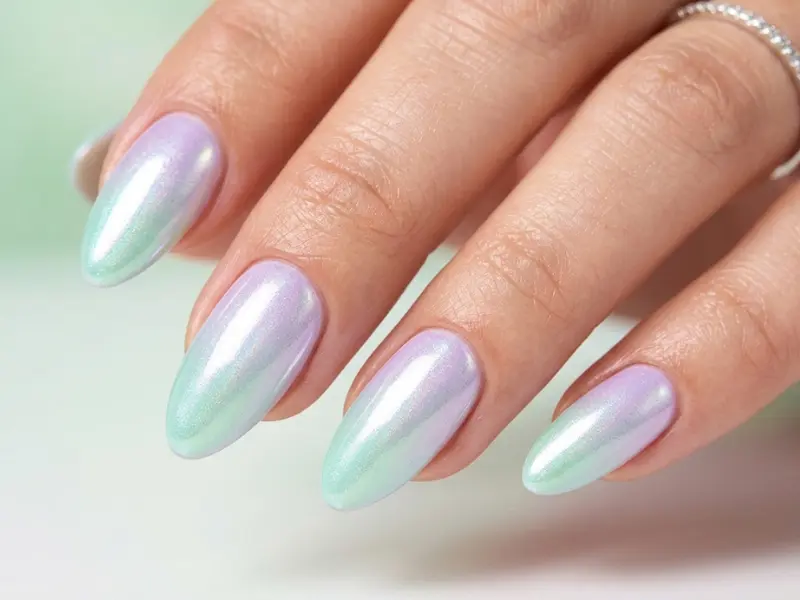
5. Pearlescent Ombre (Glazed & Gorgeous!)
Ombre is a timeless classic, but for 2026, we’re elevating it with a stunning chrome finish for that coveted “glazed donut” or “glass nail” effect. This technique beautifully merges our tips from ombre nails at home with a sponge and chrome powder nails at home guides, giving you that trendy Glazed Donut Nails look everyone loves.
- Sponge Ombre Base: First, create a soft ombre effect on the top half of your nail. You can follow our detailed sponge ombre technique to blend two pastels seamlessly over a white or sheer base. This step needs to be completely dry before moving on if you’re using regular polish.
- Chrome Application (The Magic Touch!): This is where the shimmer happens! If you’re using gel polish, apply a no-wipe gel top coat and cure it partially (check your product instructions). If using regular polish, you’ll need a special sticky base coat for chrome, or ensure your polish is almost dry but still slightly tacky. Gently rub your chosen chrome powder (a pearl or holographic finish works best for spring!) over the entire nail using an eyeshadow applicator or silicone tool.
- Brush Off Excess: Use a soft, fluffy brush to gently sweep away any excess chrome powder, revealing that dazzling pearlescent glow.
- Seal for Lasting Shine: Apply a specialized water-based top coat if you’re using regular polish with chrome (regular top coats can dull the chrome!). For gel chrome, apply and cure your standard gel top coat to perfectly protect that stunning shimmer.
Pro Tips for Your Best Spring Manicures Ever!
Ready to elevate your DIY game? These little tricks make a huge difference in achieving a salon-quality finish, especially with any of these easy spring nail art designs for beginners:
- Thin Coats Rule: This is the golden rule of nail polish application. Always apply many thin coats instead of one thick, gloopy one. It dries faster, lasts longer, and prevents bubbling.
- Patience is a Virtue (Especially Before Top Coat): When you’re doing any detailed design with dots or lines, wait at least 5-10 minutes (longer if your polish is thick) before applying your top coat. If you rush it, you’ll drag the wet paint and sadly, ruin all your hard work!
- Keep Your Tools Squeaky Clean: Acetone is your nail art best friend. Between designs or when switching colors, wipe your dotting tool or liner brush completely clean with a lint-free wipe soaked in acetone. Clean tools mean crisp designs!
- Negative Space is Your Secret Weapon: If your freehand line work wobbles a tiny bit, don’t panic! Lean into the negative space. A small, intentional-looking gap between your line and the nail edge can look incredibly chic and modern.
- Clean Up Like a Pro: This is the ultimate game-changer for a professional-looking DIY manicure. Use a small, flat cleanup brush (often called an angled eyeliner brush works great!) dipped in acetone to instantly sharpen any lines or remove polish that accidentally flooded your cuticle. It makes all the difference!
Spring Aesthetics & Dreamy Color Combinations
Struggling to visualize the perfect pastel palette? No worries! We’ve mapped out the top aesthetic trends for 2026 with easy color combinations you can try today. Mix and match for your unique spring style!
| Aesthetic | Vibe / Key Elements | Recommended Color Palettes |
| Cottagecore | Whimsical, floral, organic, natural | Moss Green + Butter Yellow + Cream |
| Coquette | Ultra-feminine, delicate, sweet, retro | Sheer Pink + Baby Blue + Soft White |
| Quiet Luxury | Minimalist, polished, elegant, “old money” | Milky White + Sheer Nude + Ultra-thin Gold Line |
| Clean Girl | Fresh, glowing, healthy, minimalist | Clear Gloss + Pearl Accent + Sheer Coral |
| Digital Lavender | Futuristic yet soft, dimension-focused | Lavender + Silver Chrome + Sheer Lilac |
Frequently Asked Questions About Spring Nail Art
How can an absolute beginner do spring nail art at home?
The best approach for a true beginner is to start with “placement art” rather than “painting art.” This means using tools like dotting tools to make simple dots or placing accessories like tiny pearls or stickers onto a wet top coat. These require much less hand stability than trying to paint intricate freehand lines or flowers. Think simple, clean, and strategic!
What are the biggest nail color trends this spring?
This spring, the season is dominated by “milked pastels”—colors like butter yellow, mint, and lavender but with a slightly sheer, creamy consistency. We’re also seeing a major rise in soft pearlescent sheers, “healthy nail” sheers (think barely-there tints), and the introduction of diffused velvet cat eye effects in dreamy pastel shades.
Do I need gel polish to do easy spring nail art designs?
Absolutely not! While gel polish (and a reliable UV/LED lamp to cure it) offers fantastic longevity and the benefit of wiping away mistakes before curing, all the designs listed in this guide (daisies, outlines, simple swirls) are perfectly achievable with traditional air-dry nail polish. Regular polish can even be easier for negative space designs as it’s less prone to shrinking from the edges.
What household items can I use for easy nail art when I don’t have special tools?
If you don’t own specialized dotting tools, you can easily use a wooden toothpick, the ball tip of a bobby pin, or even the end of a dried-out ballpoint pen to create perfect dots and flower centers. For clean lines, a piece of sewing thread or the edge of a strip of invisible tape can work perfectly in place of a fine liner brush. Get creative!
Want to master even more beginner-friendly DIY techniques? Explore these essential BlueBeek guides and get ready to impress yourself with your nail art skills!
- Geometric Nail Art with Tape: Perfect for sharp, modern looks that are surprisingly simple!
- Glass Nails at Home: Achieve that stunning, crystal-clear finish everybody’s talking about.
- How to Maintain Healthy Natural Nails: Essential tips for keeping your nails strong and beautiful, no matter your manicure choice.
- How to Choose the Best Nail Shape for Your Hands: Find the perfect canvas for your spring designs!