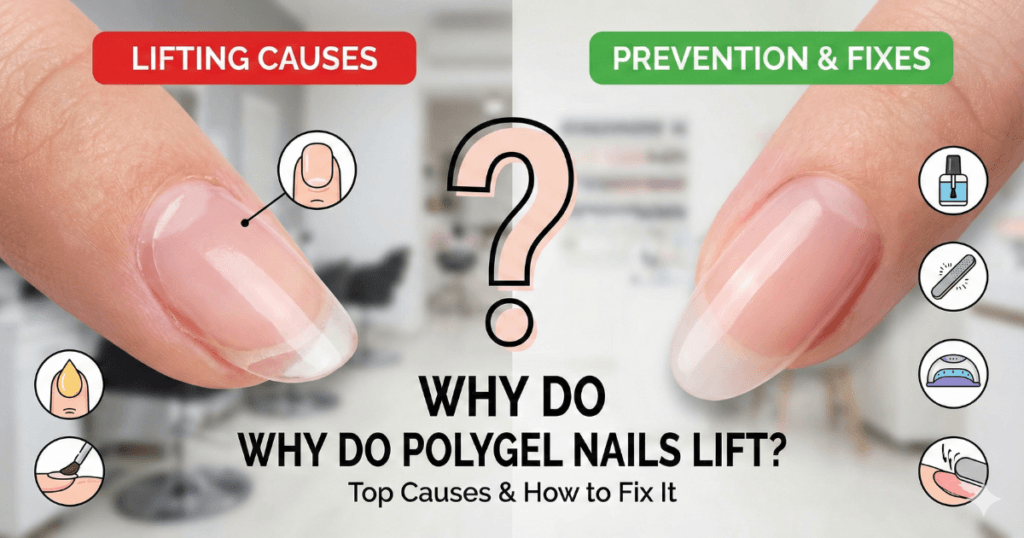
Ever dreamt of those flawless, salon-quality polygel nails that feel invincible and actually last for weeks? You know the ones – perfectly sculpted, no chips, no worries. But then, bam! Just days after pouring your heart into your manicure, you spot it: that dreaded gap, a corner peeling, an edge letting go, or even an entire nail doing a Houdini act. Ugh, it’s enough to make you want to toss your entire polygel kit into the abyss!
Trust me, I’ve been there. That sinking feeling of disappointment is SO real. But here’s the game-changing secret: learning how to stop polygel nails from lifting permanently isn’t about bad luck or faulty products. It’s almost always traceable to a few common culprits in your prep, application technique, or even your curing process. And guess what? These are completely fixable!
In this ultimate guide, I’m pulling back the curtain to share exactly why your polygel nails might be lifting, expose the super common mistakes we all make (especially when starting out!), and arm you with my personal, foolproof step-by-step routine. Get ready to say a permanent goodbye to frustrating lift-offs and a joyful hello to stunning, long-lasting beauty that truly goes the distance – think 3-4 glorious weeks!
Looking to master your at-home manicure from scratch? Check out our Beginner’s guide to doing your own nails at home for a solid foundation!
What Exactly Is “Lifting” (And Why It’s Your Polygel Nemesis)?
Okay, let’s get real about “lifting.” It’s more than just a minor annoyance; it’s when your gorgeous polygel creation starts to subtly wave goodbye to your natural nail plate. This sneaky separation usually creeps in around the cuticle, along the sidewalls, or sometimes at the free edge. You might first notice a tiny, almost invisible air gap, a ghostly white or cloudy area peeking under the product, or that utterly frustrating moment when your nail snags on your hair or favorite cozy sweater. Annoying? You bet!
But it’s not just a beauty blunder. Once air and moisture manage to sneak into that gap, the precious bond between your polygel and natural nail weakens, making it a playground for peeling, chipping, or a complete pop-off. And here’s the really scary part: if moisture gets trapped there for too long, it creates the perfect, cozy (and unhygienic!) home for bacteria, leading to those infamous “greenies” (aka bacterial infections). So, catching lifting early and understanding how to stop polygel nails from lifting permanently isn’t just about flawless aesthetics – it’s crucial for your nail health too!
The Real Reasons Your Polygel Nails Are Lifting (Let’s Get Detective!)
Before we can truly master how to stop polygel nails from lifting permanently, we need to channel our inner nail detectives and pinpoint *exactly why* it’s happening. From my years of experience, almost every lifting disaster can be traced back to one of three main culprits: improper prep, sneaky product missteps, or technique troubles. Let’s unravel them!
1. The Foundation Fails: Poor Natural Nail Preparation
Imagine building a dream house on a shaky, dirty foundation. Sounds like a disaster waiting to happen, right? Your natural nail is no different. If it’s not perfectly clean, dry, and prepped, nothing you build on top – no matter how beautiful – will last. Polygel needs a proper surface to grip onto, and if your natural nail isn’t ready, it’ll just slide right off. Here are the most common ways this crucial step goes awry:
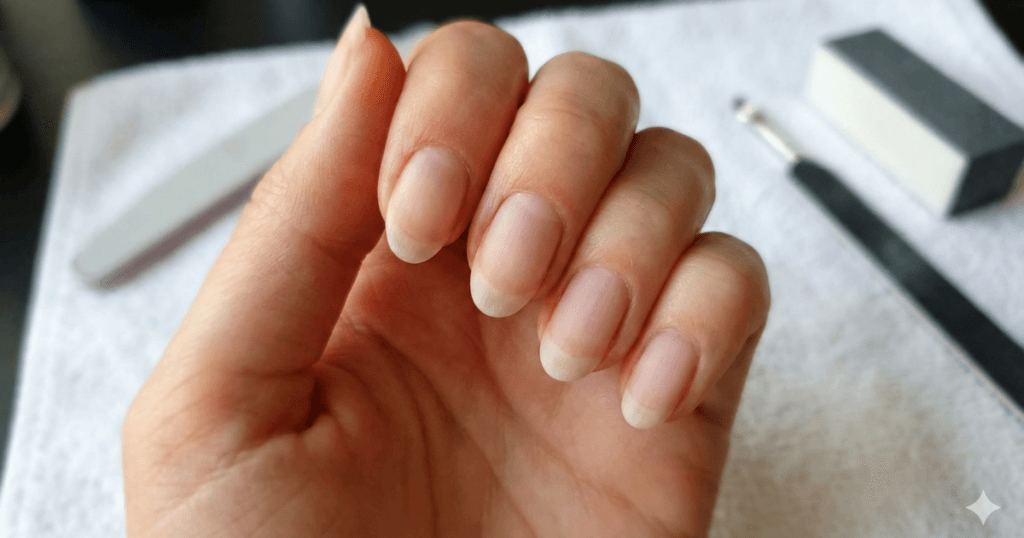
- The Sneaky Invisible Cuticle: This is probably the #1 offender! That clear, thin layer of skin (the proximal nail fold, not the eponychium) stuck to your nail plate is a bond-killer. If you don’t gently push it back and meticulously remove it, your polygel will lift every single time.
- Still Shiny? That’s a Problem: Your natural nail needs to be gently de-shined, not glossy. A light buffing creates microscopic etches that the polygel can adhere to. If it’s still shiny, it’s too smooth!
- Dust Bunnies Under Your Mani: After filing, it’s easy to overlook tiny dust particles. These create barriers between your polygel and nail, preventing proper adhesion.
- Oily or Damp Nails: Our nails naturally produce oils and moisture. If you don’t thoroughly dehydrate them, that moisture will push your polygel right off.
Seriously, nail prep is your absolute non-negotiable. If you skimp here, even the most luxurious, high-quality polygel won’t stand a chance. It’s the vital first domino in figuring out how to stop polygel nails from lifting permanently.
2. Too Close for Comfort: Polygel Touching Your Cuticle or Skin
This is a super common blunder, especially for those new to polygel. When the product accidentally smears onto your cuticle (that’s the live skin at the base of your nail, remember!) or touches your sidewalls, it creates a tiny, almost invisible “ledge.” As your natural nail joyfully grows out, that little ledge becomes a major snag-point for everything – your hair, your favorite knit sweater, even just water from washing your hands. Each little tug pulls at the product, and BOOM! Lifting often starts right from that initial contact area.
Professional nail artists, myself included, always preach leaving a small, consistent gap – think the width of a human hair, roughly 0.5-1 mm – between your polygel and your skin. This tiny, seemingly insignificant buffer zone is critical for a truly long-lasting, lift-free set. Trust me on this one!
3. The Goldilocks Problem: Too Much or Too Little Slip Solution
Ah, slip solution – the unsung hero that helps us sculpt polygel into those beautiful, envy-worthy shapes. But getting the amount just right is truly a delicate dance. Too much, and you’re in hot water; too little, and you’re wrestling with a sticky, unmanageable mess. Here’s where things often take a turn for the worse:
- Drowning Your Brush: If your brush is dripping wet with slip solution, you’re essentially watering down your polygel. This can weaken its structure, lead to soft, under-cured areas, and prevent proper adhesion. The product will “float” instead of pressing firmly onto your prepped nail.
- Flooding Dual Forms: Similar to the above, applying too much slip solution directly into your dual form creates the same issues – diluted product and a weak cure.
- Questionable Quality: Not all slip solutions are created equal. Some low-quality versions can react poorly with certain polygel formulas, leading to adhesion problems.
A personal pro tip from many seasoned nail artists (yes, that includes me!) is to ditch the traditional slip solution and swap it out for 70%-90% isopropyl rubbing alcohol. It offers far more control, evaporates super quickly, and rarely causes issues. If you do prefer a dedicated slip solution, make certain it’s a good one. A professional slip solution can make an enormous difference, especially when paired with a quality product like those found in a beginner-friendly polygel kit.
4. The Under-Cure Curse: Weak Lamp or Too Little Time
You’ve poured your effort into perfect prep, shaped your polygel flawlessly, and then… *sigh*… it lifts. The silent saboteur? Often, it’s an under-cured product. Polygel completely relies on UV/LED light to harden from a squishy gel into a rock-solid extension. If your lamp isn’t powerful enough or you don’t cure for the *full* recommended time, the polygel might *look* hard on the surface, but underneath, it’s still soft, bendy, and gooey. This uncured core stays flexible, pulling away from your natural nail, eventually leading to frustrating lifting, cracks, or even your beautiful nail snapping right off!
- Lamps that Aren’t Powerful Enough: Many starter kits come with smaller, lower-wattage lamps (sometimes under 36-48W). While fine for thin gel polish, they often can’t fully cure thicker builder gels like polygel.
- Bad Hand Placement: Are your fingers really flat and centered in the lamp? If your thumb or pinky is angled, it might not be getting full light exposure, leading to an incomplete cure.
- Skipping the Instructions: Every polygel brand has a recommended curing time. This isn’t just a suggestion! Polygel often needs longer cure times than standard gel polish. Don’t guess – check the label!
If you’re serious about achieving truly long-lasting polygel nails, investing in a robust salon-grade 48W UV/LED lamp (or even higher!) is an absolute game-changer. It ensures every single layer of your polygel cures evenly and completely, giving you that unbreakable, rock-solid hold you crave.
Curious about specific polygel kits? Don’t miss our Modelones Polygel Kit Review, where we put a popular kit to the ultimate 48W power test!
5. The Unseen Saviors: Skipping Dehydrator and Primer
These two unassuming liquids are often sadly overlooked, especially by beginners, but they are absolutely critical for understanding how to stop polygel nails from lifting permanently. Think of them as the invisible, powerhouse force field for your polygel:
- Nail Dehydrator: This magic liquid zaps away any lingering surface moisture and natural oils from your nail plate. It creates a perfectly dry, clean canvas, ensuring nothing interferes with adhesion.
- Nail Primer: Consider primer your ultimate adhesion promoter. It acts like microscopic double-sided tape, creating a super-strong bond between your natural nail and the base coat.
Many beginner polygel kits, to be frank, unfortunately omit these vital liquids, which is a massive reason why so many DIY sets throw in the towel after just a few days instead of lasting weeks. Professional nail artists swear by them, often reaching for acid-free primers for most clients and bringing out a stronger acid-based primer for those with particularly oily nail beds or chronic lifting woes. Please, don’t skip these steps if you want your polygel to truly stick around!
6. Structure S.O.S.: Too Thick or Missing the Apex
Even with flawless prep and perfect curing, your polygel can still betray you if the overall structure isn’t quite right. It’s all about balance and creating a resilient architectural masterpiece for your nail extension. Here’s what can go astray:
- Bulky at the Edges: If you over-build the product near the cuticle, sidewalls, or free edge, it can shrink unevenly during curing or create weak points. These bulky areas become prime spots for catching on things, leading to leveraged lifting and peeling.
- The Missing Apex: The apex is the highest point of your nail enhancement, located roughly in the middle, providing crucial strength and distributing stress. If your polygel lacks a proper apex, the nail becomes weak and vulnerable to everyday impacts, leading to breakage and lifting.
A perfectly structured polygel nail should be:
- Thin and Tapered: At the cuticle and sidewalls, the product should be beautifully thin, blending seamlessly with your natural nail.
- Strong at the Apex: The middle (stress area) should have a slight curve, creating that protective apex.
- Moderate at the Free Edge: Your free edge should have enough thickness for durability, but not be bulky or clumsy.
Mastering this delicate balance is *the* key to understanding how to stop polygel nails from lifting permanently due to structural stress. Practice makes perfect here!
My Foolproof Step-By-Step Routine to Permanently Stop Polygel Lifting
Alright, my fellow nail enthusiasts, armed with all this crucial knowledge, it’s time to take action! This routine isn’t just a suggestion; it’s *my personal blueprint* for achieving polygel perfection. Follow these steps consistently for every new set and every fill, and I promise you’ll witness your polygel nails transform from temporary art to truly long-lasting masterpieces. Consistency is the *true* secret to making your polygel last a glorious 3-4 weeks instead of just a few frustrating days.
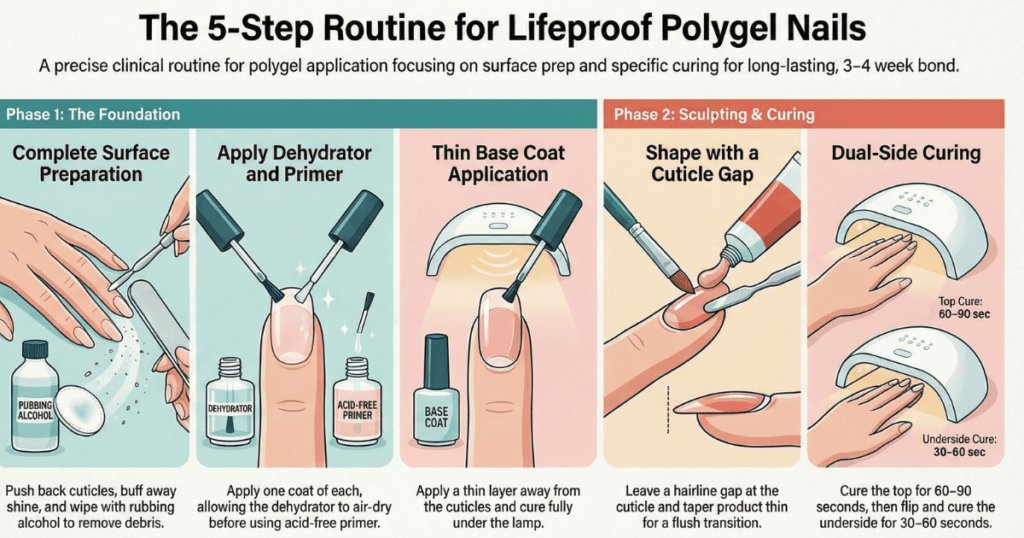
Step 1: Nail Prep – The Non-Negotiable Foundation
This is where champions are made (or where nails sadly begin their lifting journey!). Do *not* rush this, ever. I repeat, *ever*.
- First, gently remove any old product and shape your natural nails to your desired length and style.
- Next, gently push back your eponychium (the skin at the base of your nail) and, this is critical, *carefully remove all invisible cuticle* from the nail plate. Use a good quality cuticle pusher or an e-file bit on a very low setting if you’re experienced. This clear film is the enemy of adhesion!
- Lightly buff the entire natural nail surface with a fine-grit file or buffer until all the natural shine is gone. It should look matte, not glossy.
- Finally, dust off every speck of residue using a clean, lint-free wipe. Then, thoroughly cleanse your nails with 70%-90% isopropyl alcohol or a dedicated nail cleanser to remove any remaining dust, oils, and moisture.
Want to ensure your natural nails stay strong and healthy underneath your gorgeous polygel? Read our guide on How to Maintain Healthy Natural Nails Under Gel or Acrylics.
Step 2: Dehydrate & Prime – Your Invisible Bodyguards
These two steps are lightning fast but *mighty* in their impact!
- Apply a thin layer of nail dehydrator to each nail. Let it air-dry completely for a few seconds. You’ll see your nail plate turn slightly chalky as it works its magic.
- Next, apply a super thin layer of acid-free primer *only* to your natural nail plate. If you have particularly oily nails or have struggled with chronic lifting, an acid-based primer might be necessary (use sparingly and carefully!).
- Allow the primer to air-dry according to the brand’s instructions. Some primers remain slightly tacky, others dry completely.
Step 3: The Sticky Anchor: A Thin Base Coat
Your base coat is the crucial, sticky link between your perfectly prepped natural nail and the polygel. Skipping this is a cardinal sin!
- Apply a *very* thin, even layer of gel base coat over your entire natural nail plate.
- Be meticulous here: avoid flooding the cuticle area or sidewalls! If any gets on your skin, clean it up with an orangewood stick or brush *before* curing.
- Cure this base coat fully under your UV/LED lamp according to the gel brand’s instructions (typically 30-60 seconds, but always check!).
- This cured, slightly sticky “inhibition layer” provides the *perfect* textured surface for your polygel to bond onto, dramatically improving adhesion and helping you stop polygel nails from lifting permanently.
Step 4: Sculpting Smart: Shape with That Crucial Gap
Now for the fun part – sculpting! But remember, precision now prevents lifting later.
- Scoop up a controlled amount of polygel. Resist the urge to use a huge, unmanageable bead; smaller amounts are easier to control.
- Dip your brush sparingly into your slip solution (or isopropyl alcohol). Blot off any excess so the brush is just damp, not dripping wet.
- When placing and shaping the polygel (whether using dual forms or sculpting freehand), start by placing the bead near the cuticle area at a slight angle. Gently press and guide the product, working your way down the nail to push out any potential air bubbles.
- This is CRUCIAL, my friends: Always, *always*, *always* leave a tiny, clean gap (think 0.5-1 mm) between the polygel product and your cuticle/sidewalls. Ensure the product is tapered *very thinly* in these areas to prevent any future lifting. This is a game-changer!
Step 5: The Full Cure: Top & Underside
Don’t let all your meticulous hard work go to waste with an incomplete cure!
- Cure your polygel for the *full* recommended time (usually 60-90 seconds in a good 48W lamp or higher). Make sure your fingers are positioned flat and centered in the lamp to ensure even light exposure to all nails.
- For longer nails or thicker layers: It’s a smart move to flip your hand and cure the *underside* of your nails for an additional 30-60 seconds. This ensures the polygel truly hardens all the way through, preventing any pesky under-curing.
- After curing, give your nails a quick wipe with alcohol to remove the sticky inhibition layer. The polygel should feel *rock-solid* and completely firm, with no rubbery or overly flexible spots. If it does, congratulations – you’ve mastered this essential step in how to stop polygel nails from lifting permanently.
Step 6: Finish Strong: File, Refine, and Seal
The final touches make *all* the difference for both durability and dazzling aesthetics.
- Once cured, gently remove any dual forms (if used). Now, it’s time to file and refine your nail shape. Remember to keep the cuticle area and sidewalls thin and smooth, blending seamlessly with your natural nail.
- Take a moment to re-check your apex placement and ensure the overall thickness is balanced – not too thick, not too thin.
- Lightly buff the surface to smooth out any imperfections, then meticulously remove all filing dust with a brush and cleanser.
- Finally, apply your favorite gel top coat. When applying, remember to “cap the free edge” – brush the top coat horizontally across the very tip of your nail. This seals the end, creating a protective barrier against moisture and further reducing the chance of lifting. Cure your top coat fully.
Uh-Oh, It’s Lifting! How to Fix (Or When to Remove) a Polygel Nail
Even with the best intentions and flawless technique, sometimes a nail just decides to be stubborn and lift. Don’t panic! Minor lifting can often be rescued, but it’s *crucial* to know when a quick fix is okay and when it’s much safer to just start fresh. Safety first, always – especially when it comes to your nail health!
When It’s Safe to Attempt a Repair
You can usually try to salvage a nail if:
- It’s just a tiny bit of lifting on a small edge or corner.
- The area is completely dry, with absolutely no discoloration or unusual smell.
- The natural nail underneath looks perfectly healthy and free from any signs of infection.
My Quick Repair Method (for minor lifts):
- Carefully use an e-file or hand file to gently remove *all* visibly lifted product. You want to file back until only securely attached polygel remains.
- Thoroughly clean the exposed natural nail and surrounding polygel with isopropyl alcohol or nail cleanser, making sure it’s completely dry.
- Apply a thin layer of nail primer (and dehydrator if needed) only to the exposed natural nail area.
- Apply a small amount of gel base coat to the prepped area, cure, then add a tiny bead of fresh polygel to fill the gap and rebalance the structure.
- Cure fully (don’t forget the underside!) and then file, shape, and apply top coat as usual.
When You MUST Remove the Nail (No Compromises!)
This is where your inner nail health guardian needs to step up. If you spot *any* of these signs, it’s non-negotiable: remove the nail completely, no questions asked.
- The lifted area is significant, reaching far into the nail plate or even the center.
- You have any suspicion that water or moisture has been trapped under the lift for more than a day or two.
- You see *any* discoloration on your natural nail underneath – especially green (“greenies”), yellow, or brown spots. These are signs of bacterial or fungal infection.
In these situations, gently remove the entire extension (please, *never* pick or pull!), sanitize your natural nail thoroughly, and let it breathe for a while. It’s always, always better to let your nail heal completely before attempting a new set. Remember, nail health is paramount!
Need help with safe removal? Here’s our comprehensive Step-by-step guide to safely removing polygel nails at home without damage.
Frequently Asked Questions About Polygel Lifting (Your Burning Questions Answered!)
Still have burning questions about how to stop polygel nails from lifting permanently? Let’s tackle some of the most common ones I hear!
How long should my polygel nails truly last without lifting?
With diligent prep, precise application, and thorough curing (basically, by following *this entire guide!*), a well-done polygel set should comfortably last 3-4 weeks. That’s when you’d typically opt for a fill or rebalance due to your natural nail growth. If you’re seeing lifting within a few days, it’s almost *always* a clear signal that something went amiss with your prep, you touched the cuticle area, or the curing wasn’t quite complete.
Why are my polygel nails lifting only at the cuticle?
Ah, the dreaded cuticle lift! This is usually a classic tell-tale sign that some “invisible cuticle” was left on the nail plate during your prep, the polygel product was accidentally applied too close to (or even *on!*) the skin, or the product was a tad too thick at the cuticle area, causing it to shrink and pull away as it cured. Mastering your cuticle prep and religiously leaving that tiny, clean 0.5-1 mm gap should resolve this issue beautifully. Practice makes perfect!
Help! My polygel nails are popping off the very next day! What happened?
If your nails are literally *popping off* within 24 hours, my friend, it means the bond failed spectacularly! The most common culprits here are skipping those adhesion heroes – the dehydrator and primer; not properly buffing or de-oiling your natural nail; neglecting the base coat or not curing it enough; or applying polygel directly onto the skin instead of just the nail plate. Go back and *re-read* Steps 1-3 of our routine – those are your golden tickets!
Is it ever okay to just glue a lifted polygel nail back down?
I know, I know – it’s *so* tempting for a quick fix, but generally, my answer is a firm **no**. While nail glue might temporarily reattach a lifted extension, it’s a really risky move. It can easily trap bacteria and moisture underneath the nail, creating a perfect breeding ground for nasty infections (hello, ‘greenies,’ we *don’t* want you!). For any significant lifting, it’s *always* safer and healthier for your nails to gently remove the entire enhancement, thoroughly sanitize the area, and then re-do it correctly. Your nail health is absolutely worth the extra effort – seriously!

Udeshika
Nail Art Expert & Founder, BlueBeek 💅
Udeshika is a professional nail artist with 7+ years of experience creating
salon-quality nail art at home. She founded BlueBeek to help beginners master
nail art without expensive salon visits.