Do you love the look of sharp, modern geometric nail art but feel your hands aren’t steady enough for freehand drawing? You aren’t alone. Geometric line nail art using tape is one of the biggest DIY nail trends in 2026 — it looks high-end and architectural, yet it’s surprisingly easy to achieve at home using one simple secret weapon: tape.
Whether you use professional striping tape or simple household Scotch tape, you can create clean, crisp lines that look like they came straight from a luxury salon — no artistic talent required.
What Is Geometric Nail Art? (And Why It’s Trending in 2026)
Geometric nail art uses straight lines, angles, triangles, and colour blocks to create a modern, architectural look on nails. In 2026, it sits perfectly within the “Quiet Luxury” aesthetic — minimal, precise, and effortlessly polished.
The best part? Unlike freehand designs, tape-based geometric nail art is beginner-proof. The tape acts as a physical stencil, meaning steady hands are not required.
1. Why Use Tape for Geometric Nail Art?
The beauty of geometric art lies in its precision. Hand-painted lines can look uneven — tape eliminates that problem entirely:
- 📐 Precision Every Time — Tape acts as a barrier stencil, giving you perfectly straight edges
- 💅 Works on Any Nail — Short, long, natural, acrylic, or gel nails
- 🏙️ High-End Look, Low Effort — Clean lines suggest a professional level of detail
- 🤍 Minimalist Appeal — Fits perfectly with the Quiet Luxury and Clean Girl aesthetics trending in 2026
- 💰 Budget Friendly — Scotch tape from your desk drawer works just as well as professional striping tape
2. Essential Tools for Geometric Nail Art with Tape
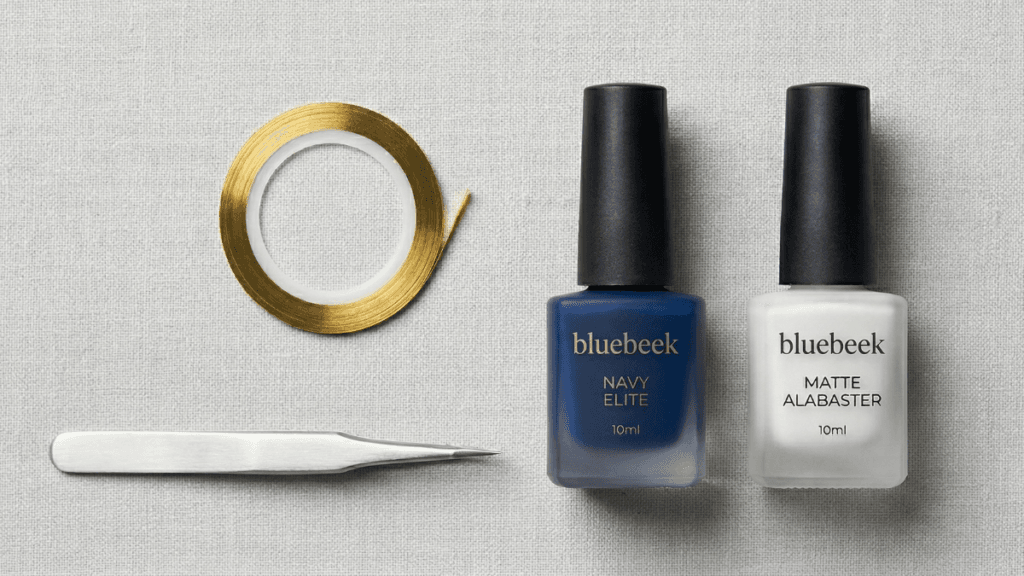
Before you start, gather these tools for the smoothest application:
- Striping Tape or Washi Tape — Striping tape is ultra-thin for fine lines; Washi or Scotch tape works for larger colour blocks
- Tweezers — To place and peel tape precisely without smudging your polish
- High-Pigment Polish — A colour that covers fully in one coat, so the “step” between layers isn’t too thick
- Fast-Dry Top Coat — Seals the design quickly and reduces smudging risk
- Matte Top Coat (Optional) — Geometric designs look especially modern and editorial with a matte finish
- Cleanup Brush & Acetone — For fixing any edges that bleed💡 Pro Tip: Striping tape left on the nail and sealed with top coat creates a permanent metallic line effect — no painting needed!
3. How to Do Geometric Nail Art with Tape — Step by Step
Step 1: Apply Your Base Colour
Apply your chosen base colour and let it dry completely — this is the single most important step. If the base is even slightly damp when you apply the tape, it will peel away your polish when removed, ruining the design.
⏱️ Wait at least 20–30 minutes, or use a fast-dry top coat to speed up the process.
Step 2: Map Out Your Geometric Design
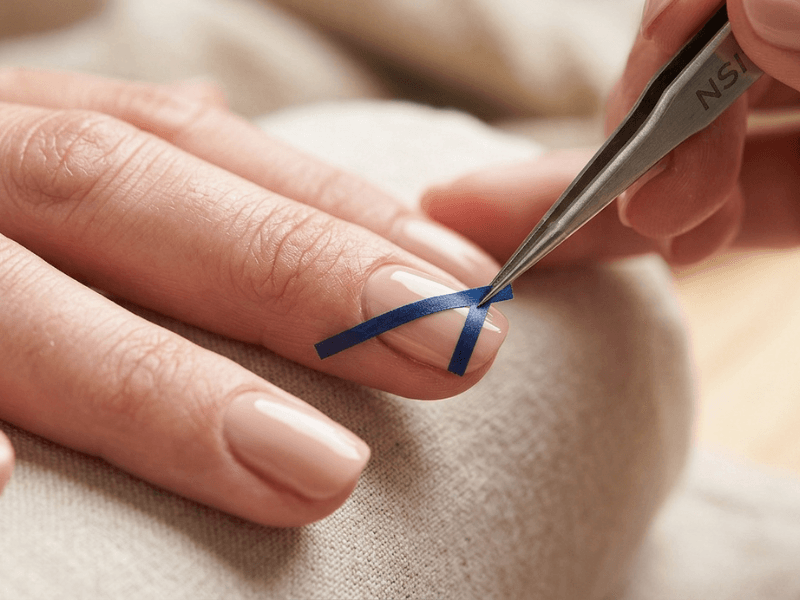
Using tweezers, carefully lay your tape onto the dry nail in your desired pattern:
- Single Vertical Line — The most minimalist option; splits the nail into two colour zones
- Triangle at the Base — Creates a geometric colour block at the cuticle end
- Diagonal Stripe — A bold, modern split across the nail
- “V” Shape at the Tip — Creates a sharp chevron effect🔑 Key Tip: Leave a small “tail” of tape hanging off the edge of your finger so you can grab it easily when peeling.
Step 3: Paint the Contrast Layer
Apply your second colour over the taped area using thin, even strokes. Use less polish than you think you need — a thin layer prevents colour from seeping under the tape edges and keeps the “step” between layers minimal.
Step 4: Peel the Tape Immediately
This is the most critical technique in tape geometric nail art: do not wait for the second colour to dry. Peel the tape away while the polish is still wet, pulling at a 45-degree angle toward the nail for the sharpest, cleanest line possible.
⚠️ If you wait until the polish dries, it will crack and tear along the tape edge instead of giving you a clean line.
Step 5: Clean Up and Seal
Use your cleanup brush and acetone to neaten any edges that bled slightly. Once satisfied, apply a layer of Glossy or Matte Top Coat over the entire nail, making sure to cap the free edge to prevent chipping.
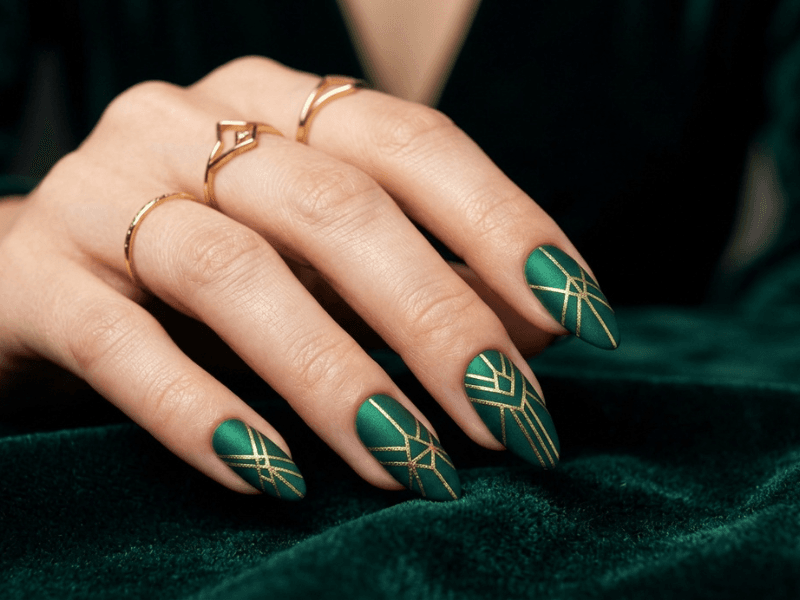
4. 2026 Geometric Nail Art Design Ideas to Try
| Design | How to Do It | Difficulty |
|---|---|---|
| Negative Space Triangle | Tape a triangular area to expose bare nail; paint the rest | ⭐⭐ |
| Double Chevron | Two stacked “V” shapes at the tip for a futuristic look | ⭐⭐⭐ |
| Micro-Lines | Apply ultra-thin gold or silver striping tape and seal it permanently | ⭐ |
| Colour Block Half Moon | Tape across the lunula (base) for a contrasting half-moon | ⭐⭐ |
| Diagonal Split | One diagonal line divides the nail into two contrasting colours | ⭐⭐ |
| Asymmetric Lines | Multiple lines at different angles for an abstract look | ⭐⭐⭐ |
5. Pro Tips for Flawless Geometric Lines
- 🎯 Press Tape Edges Firmly — Run your fingernail along the tape edge to seal it before painting; this prevents bleeding
- 🌬️ Dry Base = Everything — Never rush the drying stage; use a nail dryer fan if needed
- 🔁 Thin Coats Only — One thin coat of the second colour is always better than one thick coat
- ✂️ Cut Custom Shapes — Scissors can trim Washi tape into triangles, curves, and chevrons before applying
- 🥇 Matte Finish = Modern — A matte top coat over geometric designs elevates the look instantly in 2026
Frequently Asked Questions (FAQ)
Q: Can I use regular Scotch tape for geometric nail art?
Yes! Regular Scotch tape works perfectly for larger colour blocks and diagonal lines. For thinner, more precise lines, striping tape gives better results.
Q: Why is my polish peeling when I remove the tape?
Your base colour wasn’t fully dry. Always wait at least 20–30 minutes before applying tape, or use a fast-dry top coat first.
Q: Do I peel the tape while polish is wet or dry?
Always peel while the second colour is still wet — this gives you the cleanest, sharpest edge.
Q: What nail shapes work best for geometric nail art?
Square and coffin shapes work best as they provide a flat surface for straight lines. However, geometric designs work on all nail shapes.
Q: Can I do geometric nail art on gel nails?
Yes — apply tape after curing your base gel colour. Apply gel top colour over tape, then peel before curing under the lamp.

Udeshika
Nail Art Expert & Founder, BlueBeek 💅
Udeshika is a professional nail artist with 7+ years of experience creating salon-quality nail art at home. She founded BlueBeek to help beginners master nail art without expensive salon visits.