Glazed Donut Nails at Home — Easy Pearl Chrome Look 2026
Want that mesmerizing, iridescent sheen you’ve been seeing all over your feed? Achieving salon-quality glazed donut nails at home is way easier than you think—no expensive salon visits required.
That chic, high-end “glass-like” finish looks intimidating, but with the right beginner-friendly tools, you can completely master this viral 2026 trend on your own terms. From the must-have chrome powders to insider application tricks, let’s walk through how to transform your next DIY manicure into a total masterpiece.
What Are Glazed Donut Nails?
If you haven’t tried this viral trend yet, here is the breakdown. Glazed donut nails are all about capturing the signature iridescent sheen of a freshly glazed pastry. It’s the ultimate “quiet luxury” look, pairing a subtle milky or pastel base with a micro-shimmering chrome powder to create a semi-translucent finish.
Unlike a chunky glitter topcoat, special pigments are buffed right onto the nail surface for a uniform, pearly luster. It’s clean, elegant, and easily the top nail trend for 2026. Think of it as a modern, sophisticated upgrade to traditional shimmer polish.
Why You Should Try Glazed Donut Nails at Home
Let’s be honest: regular salon visits add up fast. Learning how to do glazed donut nails at home saves you serious cash while giving you complete creative control.
Plus, it’s far more forgiving than complex techniques like ombre nails at home with or geometric art. Once you get the hang of buffing the powder, you can easily customize the intensity. Want a subtle, sheer glow? Buff lightly. Want a high-shine mirror finish? Add a bit more pressure. You’re the boss of your own manicure.
Pro Tip: Your base color makes all the difference. The more opaque and pigmented your base, the harder it will be to achieve that semi-translucent, glassy effect. Stick to one or two thin, slightly sheer coats for the best results.
What You Need: The Ultimate Shopping List
To get that ultra-smooth, professional look, you’ll need the right gear. Here is your essential shopping list for DIY glazed nails:
- Prep Tools: A good nail file, buffer block, and cuticle pushers. Proper prep is critical for any long-lasting mani (check out our guide on [INTERNAL LINK: Why Do Polygel Nails Lift -> why do polygel nails lift] for extra adhesion tips).
- Base Gel & Top Gel: A reliable base coat and a tack-free (non-wipe) top coat. Crucial warning: If you buff chrome powder onto a standard sticky inhibition layer, it will turn into a dull, cloudy paste instead of a mirror finish.
- Base Gel Color: A sheer milky-white, off-white, or soft nude gel polish.
- Chrome Powder: The star of the show! Look for specialized pearl or glazed chrome powders rather than heavy silver mirrors. We love the budget-friendly Beetles Gel Polish Chrome Powder Set (DoFollow) for gorgeous iridescent reflections.
- UV/LED Lamp: Essential for curing gel formulas. If you need a reliable setup, check out this Modelones polygel kit review.
- Buffing & Cleanup Tools: A small eyeshadow sponge applicator, a soft duster makeup brush, and isopropyl alcohol.
How to Do Glazed Donut Nails at Home Step-by-Step
Ready to create your dream manicure? Follow these simple steps for a flawless, long-lasting finish.
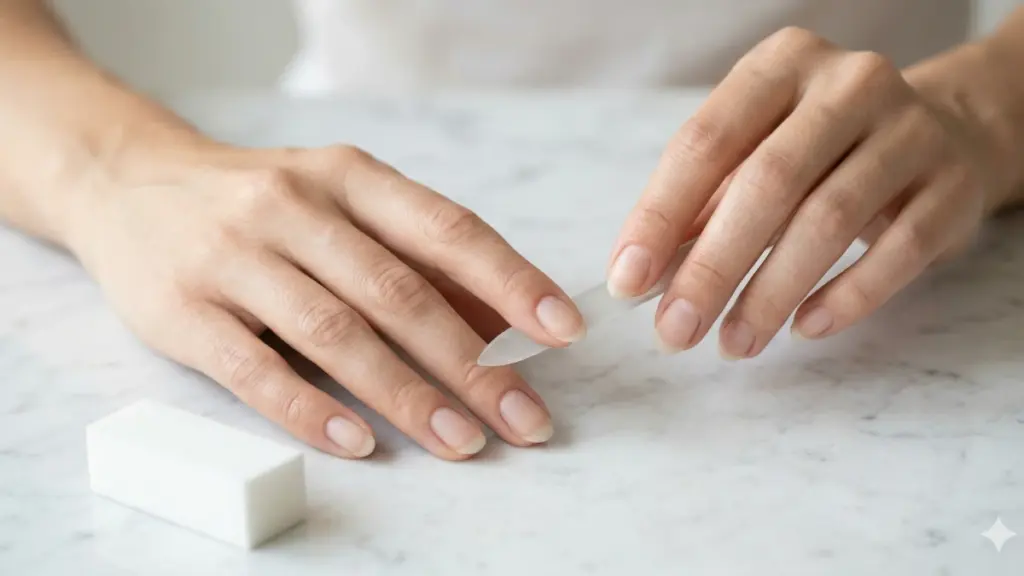
Step 1: Prep Your Nails Like a Pro
Start with a clean canvas. Shape your nails—take a look at [INTERNAL LINK: Best Nail Shape for Your Hands -> which nail shape is best for your hands] if you need help deciding—then gently push back your cuticles and buff away shine. Wipe down with alcohol to dehydrate the nail plate.
Step 2: Apply and Cure Your Base Gel
Apply a thin layer of base gel to all nails and cure fully under your lamp. This creates the essential anchor for your manicure.
Step 3: Add Your Sheer Color Base
Apply one or two ultra-thin, sheer coats of your chosen milky base color, curing between each layer. Keep it light and translucent!
Relatable Moment: We’ve all applied that second coat way too thick at least once. Resist the urge—thin, even layers are your absolute best friend here.
Step 4: Apply the Tack-Free Top Coat
This is the magic step. Apply a thin layer of your non-wipe top gel over the cured color and cure completely. It should feel glassy, smooth, and completely tack-free.
Step 5: Prepare for Chroming
While your top coat cools for about 10 seconds, grab your chrome powder and eyeshadow sponge. That brief pause helps the powder grip the surface much better.
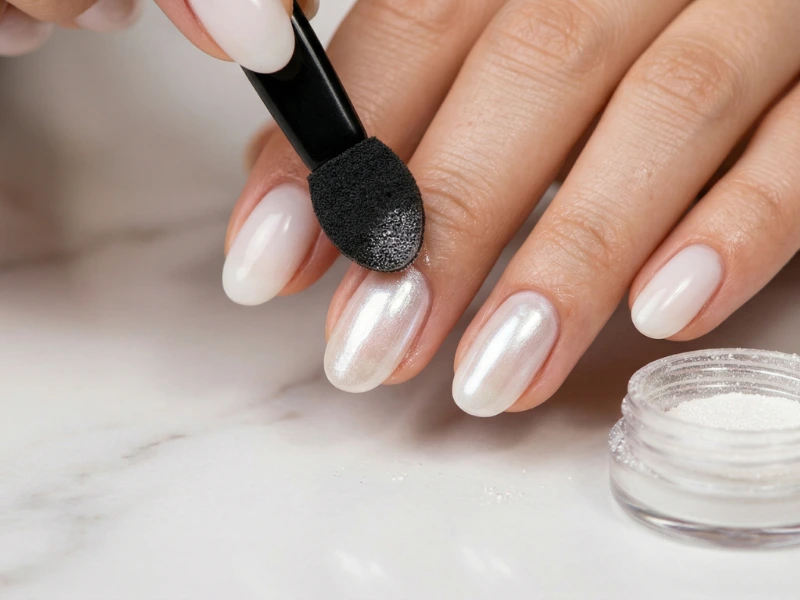
Step 6: Apply and Buff the Chrome Powder
Pick up a tiny dab of pearl chrome powder with your applicator. Tap it onto the center of the nail and buff gently in circular motions. Watch that gorgeous iridescent sheen instantly appear! Remember: a little powder goes a very long way.
Step 7: Dust Off Excess Powder
Once you’re happy with the glow, use your soft duster brush to sweep away loose powder. Don’t skip this—leftover dust will make your final top coat look streaky.
Step 8: Seal with Your Final Top Coat
Apply a generous, even layer of your non-wipe top gel. Make sure to cap the free edge (run the brush along the very tip of the nail) to lock out chips and keep your manicure looking fresh for weeks.
Step 9: Final Cure and Pamper
Cure that final layer, wipe away any stray dust, and massage some nourishing cuticle oil around your nails. Step back and admire your gorgeous 2026-worthy work!
Pro Tips for Flawless DIY Glazed Nails
- Thin Coats Are Non-Negotiable: Thick layers equal wrinkles and lifting. Keep every coat paper-thin.
- Embrace the Cool-Down: Let your tack-free top coat cool for 10–15 seconds before buffing your chrome powder.
- Buff Until It Shines: If your nails look patchy, you either need a tiny bit more powder or a little more buffing elbow grease.
- Choose the Right Powder: Avoid chunky glitters; look for ultra-fine-milled pearl or glazed chrome pigments.
- Practice Makes Progress: Just like mastering [INTERNAL LINK: French Tips for Beginners -> french tips for beginners], getting the right buffing pressure takes a quick minute to learn. Have fun with it!
[IMAGE PLACEHOLDER ID: finished-glazed-donut-nails-with-skin-tone.webp]
Glazed Donut Nail Design and Color Ideas for 2026
Want to mix up the classic milky white look? Try these gorgeous color pairings for your next set:
| Base Polish Color | Chrome Powder Type | The Vibe |
|---|---|---|
| Sheer Milky White | Classic Pearl / Opal | The original Hailey Bieber glazed donut |
| Soft Baby Pink | Pink-Shift Pearl | Coquette aesthetic perfection |
| Warm Butter Yellow | Gold-Shift Pearl | Sun-kissed, creamy summer look |
| Icy Lavender | Lavender / Blue Chrome | Edgy, dreamy winter wonderland |
| Bare Nude | Champagne Shimmer | The ultimate “your nails but better” look |
Frequently Asked Questions
Can I do glazed donut nails at home with regular polish?
Yes, but it’s much trickier. You have to wait for your top coat to reach that sweet spot where it’s almost dry but still slightly tacky before gently buffing the powder on. It takes precise timing, and regular polish won’t give you that ultra-durable, true mirror finish that gel provides.
What if I don’t have a non-wipe top coat?
Unfortunately, a standard sticky top coat won’t work. Buffing chrome powder onto an inhibition layer turns the pigment into a messy, dull paste. A quality non-wipe top coat is an absolute must-have investment for this look!
How long does the glazed effect last and does it chip?
With a proper gel application, your manicure can easily last 2 to 3 weeks. Because the chrome powder is sandwiched securely between two top coats, it’s remarkably durable. Just make sure your nail prep is thorough so your base doesn’t lift prematurely.
Can I use shimmer polish instead of chrome powder?
Shimmer polish adds sparkle, but it won’t replicate that semi-translucent, mirror-like luster of true glazed donut nails. Specialized chrome powder is the secret ingredient that creates that smooth, glazed finish.
How do I keep my cuticle area clean when chroming?
Try using a liquid latex peel-off barrier around your skin before you start. Once you’re done buffing your powder, simply peel it away for crisp, clean lines with zero messy cleanup! (This trick is also a lifesaver for [INTERNAL LINK: Dotting Tool Nail Art -> dotting tool nail art for beginners]).ished chroming, simply peel it away along with any stray powder or polish. It creates a perfectly crisp line with zero cleanup effort. This trick also works great for messy designs like dotting tool nail art.

Udeshika
Nail Art Expert & Founder, BlueBeek 💅
Udeshika is a professional nail artist with 7+ years of experience creating salon-quality nail art at home. She founded BlueBeek to help beginners master nail art without expensive salon visits.