Ever stared at those gorgeous, intricate nail art designs online and wondered, “How on earth do they do that?” We’ve all been there! Trying to create delicate lines or tiny dots with the wide brush from your polish bottle feels like trying to paint a masterpiece with a broom. If you’re ready to ditch the struggle and level up your at-home manicures, then you’re officially on the hunt for the best nail art brushes for beginners.
Trust me, switching from bulky applicators to precise, specialized tools is a total game-changer. It unlocks a whole new world of creativity, making those salon-worthy looks achievable right from your couch. In this ultimate guide, we’ll dive into why these brushes are essential, how to use them without making a massive mess, and where to find high-quality, budget-friendly sets that will have you feeling like a nail art pro in no time. By the end, you’ll be well-equipped to master stunning at-home manicures that truly impress, proving that the DIY nail art manicure for beginners is within your reach!
What Are Nail Art Brushes?
Think of nail art brushes as tiny, specialized paintbrushes, but instead of canvas, your nails are the masterpiece! They’re designed to handle nail polish, gel, or acrylic with extreme precision – something your standard polish bottle brush (which is built for speed, not detail) simply can’t do. These brushes come in a dazzling array of hair lengths, shapes (like super fine-point liners, broad flat brushes, or perfectly angled tips), and thicknesses. You’ll often see them labeled 0, 00, or even 000 for those impossibly tiny details. For any beginner dreaming of moving beyond simple single-color applications, understanding these differences is your first crucial step.
Why the Best Nail Art Brushes for Beginners Work
Alright, let’s get real: investing in the best nail art brushes for beginners isn’t just about adding more tools to your kit. It’s about unlocking your full creative potential and making your DIY nail journey genuinely enjoyable. Here’s why these brushes are an absolute must-have:
- Ultimate Precision: Let’s face it, standard polish brushes are terrible for dots, thin lines, or delicate shapes. They’re too big and hold way too much product. Specialized tools give you the control you need, especially when you’re just learning to master those tiny strokes.
- Design Freedom: Once you have the right brushes, you’re no longer limited by your polish bottle’s built-in applicator. Want to try the trending minimalist nail art, delicate outlines, or intricate coquette bows you see on Instagram and TikTok? Now you can!
- Cleaner, Polished Results: The right brush size helps you avoid messy cuticles and thick, globby polish. Your finished manicure will instantly look more professional and polished, making people wonder if you just left the salon.
- Confidence Booster: Nothing is more discouraging than spending time on a design only for it to look like a blurry mess. Seeing clean lines and perfectly formed shapes will motivate you to keep practicing and trying even more advanced looks.
- Product Versatility: Many high-quality synthetic brushes work beautifully with regular polish, gel paint, or even when learning to apply chrome powder nails at home. This means you get more bang for your buck and can experiment widely without needing a dozen different tool sets.
What You Need — The Starter Kit
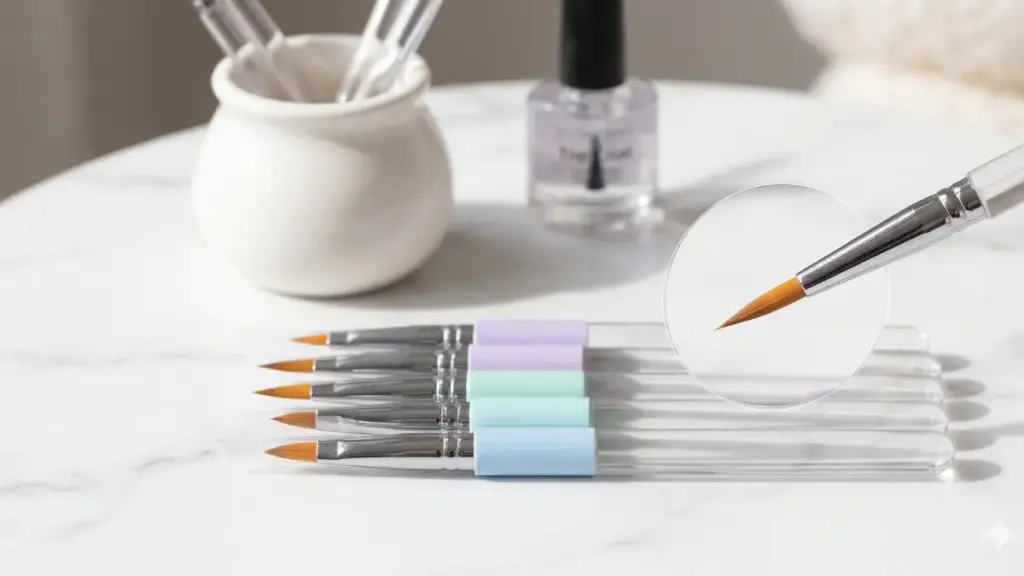
When you’re first dipping your toes into nail art, the sheer number of brushes out there can be overwhelming. You definitely don’t need a fifty-piece set right away! Instead, focus on a curated starter bundle that covers the most common techniques. Look for quality synthetic bristles – they’re durable, easy to clean, and perfect for beginners. Here’s what your essential starter kit should include:
- Liner Brushes: Get at least two sizes. A very short one (around 5mm) is fantastic for tiny details, small dots, and precise outlines. A longer one (10mm-15mm) is your secret weapon for creating effortlessly straight lines, crisp stripes, and classic French tips.
- Flat Brushes: These are versatile for things like one-stroke designs (a bit advanced, but fun to learn!), shading, or cleaning up messy edges around your cuticles for a truly polished look.
- Angled Brushes: Absolutely essential for achieving flawless French manicures or painting sharp, defined geometric shapes with ease.
- A Dotting Tool: While not technically a “brush,” this double-ended metal tool is non-negotiable for beginners! It’s perfect for creating simple flower patterns, polka dots, marbling, or precisely placing rhinestones. You’ll find it indispensable for dotting tool nail art for beginners.
How to Do Easy Designs with the Best Nail Art Brushes for Beginners Step-by-Step
Okay, you’ve got your new brushes – yay! Now let’s put them to work. Here’s a super simple, foolproof guide using a long liner brush to create the cleanest, most delicate lines. It’s a classic look that perfectly blends Quiet Luxury and Clean Girl vibes, making your nails look effortlessly chic.
1. Prep and Base Coat
Always start with nails that are clean, dry, and perfectly shaped. Apply a good quality base coat to protect your nails, then follow with two thin coats of your chosen sheer pink or nude polish. Make sure this layer dries completely before moving on.
2. Load Your Long Liner Brush
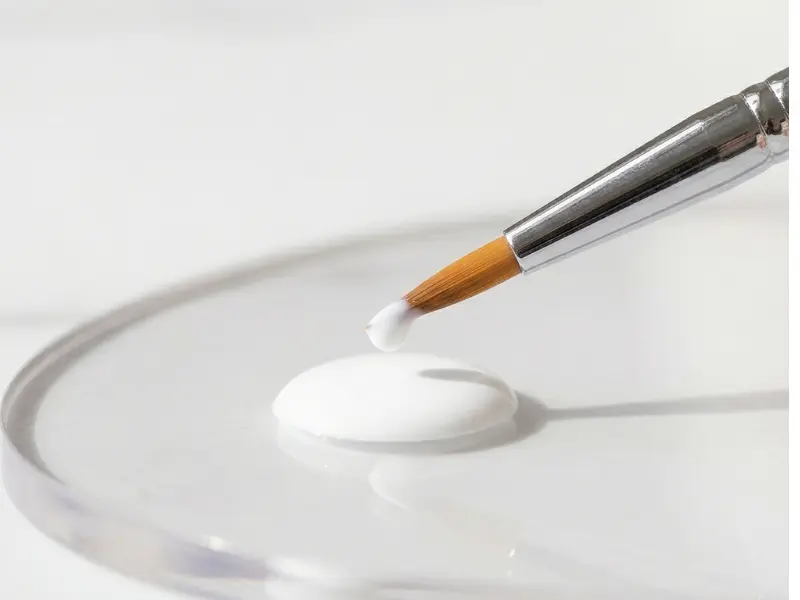
Pour a small puddle of your accent color (a crisp white or shimmering metallic gold works beautifully) onto a palette or even a piece of tin foil. Dip only the very tip of your long liner brush into the color.
Pro Tip: Don’t overload the bristles! You’re aiming for a fine bead of polish, not a giant drip. If you pick up too much product, lightly wipe the excess off onto your palette before even thinking about touching your nail.
3. Draw One Steady Line
Gently place the brush tip near your cuticle on one side of the nail. With a light, feather-like touch, drag the brush in a smooth, continuous motion towards the tip. The key is to keep your pressure incredibly even and consistent – don’t lift the brush halfway through! Repeat on the other side if you want a simple, elegant geometric accent or a sophisticated take on negative space nail art for beginners without needing any tape.
Warning: Resist the urge to press down hard! Gentle pressure is what creates that beautiful, fine line. Heavy pressure will lead to a thick, messy stripe that’s incredibly difficult to control and clean up.
4. Clean Up and Top Coat
If you accidentally made any tiny mistakes, quickly grab a clean-up brush (or a small, flat brush) dipped in pure acetone to gently wipe away any stray polish before it dries. Once you’re thrilled with your design and it’s completely dry, seal everything in with a generous layer of high-gloss top coat. This not only protects your hard work but also adds that enviable, glass nails-like salon-quality shine!
Pro Tips for the Best Nail Art Brushes for Beginners
Mastering nail art brushes definitely takes practice, but these insider tips will help you shortcut the learning curve and keep your new tools in pristine condition for years to come:
- Thin Your Polish: Regular nail polish can sometimes be a bit too thick for intricate line work. If it’s not flowing easily from your brush, add just a drop or two of polish thinner (never acetone!) to your palette puddle. This will help you achieve that perfect, ink-like consistency needed for super detailed designs.
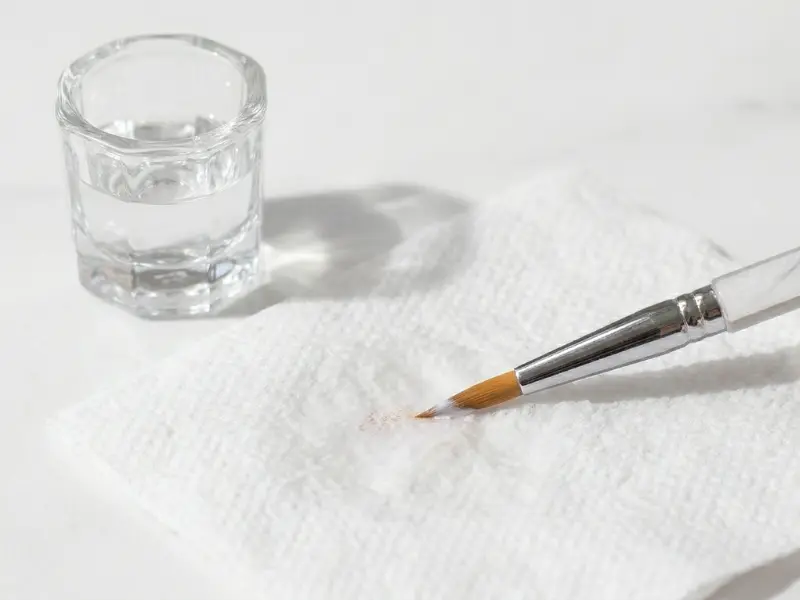
- Keep Them Clean, But Be Gentle: For regular polish, use high-purity acetone. For gel, high-percentage isopropyl alcohol is your best friend. Never scrub the bristles roughly on a paper towel! Instead, gently dip the brush into the solvent and wipe lightly in one direction on a lint-free wipe. This preserves the delicate shape of the point, which is crucial for precision.
- Store with Capped Tips: Always store your clean brushes upright in a cup with their protective plastic caps on, or lay them flat in a specialized brush case. This simple step prevents the delicate bristles from bending or splaying, which can instantly ruin their precision for fine lines and detailed work like French tips for beginners.
- Start with Gel Paint: If you’re finding regular polish dries too quickly while you’re trying to perfect a design, give gel paint a try. It only cures under a UV/LED lamp (we highly recommend a reliable beginner UV/LED lamp for speedy drying!), giving you unlimited time to work, wipe off mistakes, and restart before finalizing your look. Consider a good quality gel polish kit for beginners to get started.
- Brushes Aren’t for Polygel (Usually): While you can use a flat brush to smooth out Polygel using slip solution, specialized spatulas and stiffer brushes are generally better suited for sculpting. To learn more about the correct tools and methods, check out our review on the Modelones Polygel kit. If you ever wonder why do Polygel nails lift, our guide has answers!
- Use Your Whole Arm: When you’re painting long, straight lines, try to lock your wrist and move your entire forearm instead of just your fingers and wrist. This technique creates much smoother, steadier lines, making complex designs feel effortless.
Top-Rated Beginner Brush Sets for 2026
When you’re ready to buy, it’s easy to get lost in the sea of options. Don’t worry, we’ve done the deep dive for you! These top-rated beginner brush sets for 2026 offer incredible value, feature high-quality synthetic bristles, and provide the perfect variety of shapes to master any design you can imagine. We’ve highlighted a few of our favorites – happy shopping!
| Brand/Set | Key Features | Best For | Price Point |
| Maniology Essentials | 3 multi-use brushes, ultra-fine liner, 1 dotting tool | All beginner techniques, especially detailed stamping clean-up | $ |
| Winstonia “Berry” Set | Extremely thin liner lengths, comfortable handles | Achieving razor-sharp lines and delicate details | $$ |
| Beetles Gel Polish Set | 7 brushes including liner, flat, angled, and fan; budget-friendly | Complete versatility for gel users; excellent Modelones Polygel kit companion | $ |
| Saviland Liner Brushes | Set of 5 pure liner brushes with different lengths (5mm-25mm) | Perfecting straight lines, plaids, and intricate geometric patterns | $ |
| Gitti Conscious Beauty | High-quality, sustainable wood handles, vegan bristles | Eco-conscious beginners wanting professional-grade quality | $$$ |
| Makartt Pro Liner Set | 3 fine liner lengths, elegant design, works with all polish types | Minimalist beginners focused solely on line art and French manis | $$ |
| MelodySusie 10pc Set | Large variety pack including cleanup and fan brushes | Experimenting with every type of design before committing to pro tools | $ |
Looking for a fantastic starting point? The Beetles Gel Polish Brush Set (available on Amazon) offers incredible versatility and value, especially if you’re venturing into gel nail art. It’s a great companion for any gel nail art kit! Remember, clicking on these links helps support our site at no extra cost to you, allowing us to keep bringing you awesome nail art guides.
Frequently Asked Questions
What is the single most important brush for a nail art beginner?
Without a doubt, a fine liner brush (specifically a shorter one, around 5-7mm) is your secret weapon. It’s incredibly versatile for creating delicate dots, tiny shapes, precise outlines, and even basic French tips. This brush gives you far more control than any other tool when you’re first learning, making it the most critical one to own.
Can I use regular paintbrushes from a craft store for nail art?
While technically possible, we really don’t recommend it. Craft store brushes, especially the super cheap ones, aren’t designed to withstand harsh chemicals like acetone, which means they’ll fray and degrade quickly. Their bristles are also often too stiff and coarse, leading to streaks, poor product pick-up, and a whole lot of frustration. Investing in synthetic brushes made specifically for nail art ensures solvent resistance and the fine control you need for beautiful results.
Do I need different brushes for regular polish versus gel polish?
Generally, high-quality synthetic bristles are compatible with both traditional air-dry polish and UV/LED gel. However, dedicated gel paints are often thicker and more pigmented, so some artists prefer slightly stiffer synthetic bristles specifically designed for pushing and manipulating gel product. If your primary focus is gel, look for sets labeled “gel painting brushes” to ensure they can handle the unique texture without fraying.
How do I clean my nail art brushes properly?
For regular polish, use high-quality, pure acetone. For gel, high-percentage isopropyl alcohol (rubbing alcohol) works best. Gently dip the bristles into the solvent, then wipe lightly in a swirling or one-way motion on a lint-free wipe or paper towel. The absolute golden rule: never scrub the bristles against a surface or on a rough paper towel, as this will instantly splay the delicate tip and ruin its precision for fine work.
Related Guides You’ll Love
Ready to keep exploring more beginner-friendly DIY nail ideas? Check out these easy guides to fuel your nail art obsession:
- 5 Easy Nail Art Designs for Beginners: Step-by-Step Tutorials
- Effortless Spring Nail Art 2026: 5 Stunning DIY Looks for Beginners
- Geometric Nail Art with Tape: Get Perfect DIY Lines at Home
- Chrome Powder Nails at Home: Mirror Finish in 10 Minutes
- Glazed Donut Nails at Home — Easy Pearl Chrome Look
- Master Stunning Velvet Cat Eye Nails: DIY Guide