Learning how to do ombre nails at home with a sponge is easier than you think — and the results look like they came straight from a high-end salon. If you’ve been scrolling through dreamy sunset-fade nails on Instagram thinking “I could never do that without an airbrush machine,” this guide is about to change your mind completely.
The truth is, ombre nails at home with a sponge require zero artistic talent, zero expensive equipment, and zero salon experience. All you need is a makeup sponge, two colours you love, and about fifteen minutes. Let’s get into it.
What Are ombre Nails — And Why Is Everyone Doing Them in 2026?
ombre nails (also called gradient nails) feature two or more colours that seamlessly blend into each other across the nail. In 2026, the Aura Nail and Sunset Fade trends have pushed ombre nails to the top of every nail art list — and the sponge technique is the easiest, most beginner-friendly way to achieve them at home.
The sponge’s porous texture breaks colour into thousands of tiny dots. When those dots overlap between two colours, your eye blends them naturally — creating that soft, professional gradient without a single brushstroke.
Why ombre Nails at Home with a Sponge Actually Work
Still sceptical? Here’s why the sponge method for ombre nails genuinely delivers salon-quality results:
- 🎨 No Steady Hand Required — The sponge does the blending work for you
- 💅 Works on Any Nail Type — Natural, acrylic, gel, short, or long
- 💰 Budget Friendly — A makeup sponge costs less than $2
- ⏱️ 15 Minutes Start to Finish — Faster than driving to a salon
- 🌈 Endless Colour Options — Pink to gold, blue to white, lilac to navy — anything goes
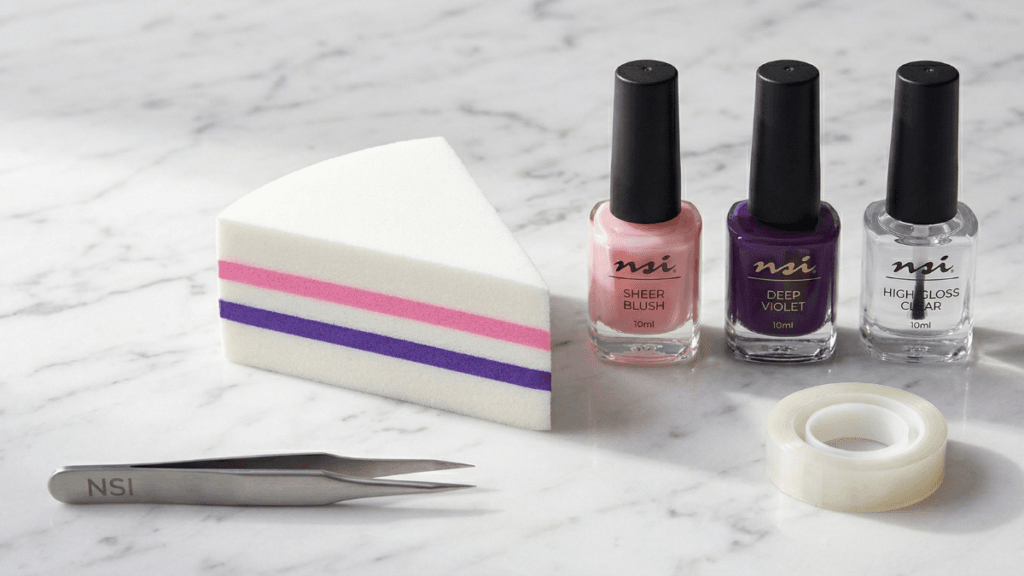
1. Everything You Need for ombre Nails at Home with a Sponge
Before you start your DIY ombre nails, set up your station with these essentials:
- 🧽 Dense Wedge Makeup Sponge — The foundation of the sponge ombre nail technique. A dense sponge creates a soft blur; large-holed sponges create a bubbly, uneven finish
- 🎨 Two or Three Harmonious Nail Polish Colours — Choose colours that blend naturally: pink to orange, baby blue to navy, or white to lavender for the trending Aura Nail look
- 🛡️ Liquid Latex or Scotch Tape — Apply around cuticles before starting. This single step separates a “DIY fail” from a “salon win” when doing ombre nails at home
- ✨ High-Gloss Top Coat — Your secret blur tool. Applied while the gradient is tacky, it melts both colours into one seamless fade
- 🧹 Cleanup Brush & Acetone — For perfecting edges after latex removal📸
2. How to Do ombre Nails at Home with a Sponge — Step by Step
Step 1: Apply Your Base Colour
Paint your lightest colour as a solid base across all nails. Let it dry completely — at least 15–20 minutes — before moving on. This base layer keeps your gradient colours vibrant and prevents them from sinking into the bare nail.
⏱️ Pro Tip: Use a fast-dry top coat over the base to cut waiting time in half.
Step 2: Protect the Skin Around Your Nails
Apply liquid latex around your cuticles and surrounding skin. No liquid latex? Press thin strips of Scotch tape around each nail instead. This prep step takes 60 seconds and saves 20 minutes of cleanup when doing gradient nails with a sponge at home.
Step 3: Paint the Colours onto Your Sponge
Instead of painting directly onto your nail, paint your two colours onto the edge of the sponge in horizontal stripes — lightest colour on top, darker colour on the bottom, with a small overlap where they meet. That overlapping zone is where your ombre nail gradient begins forming.
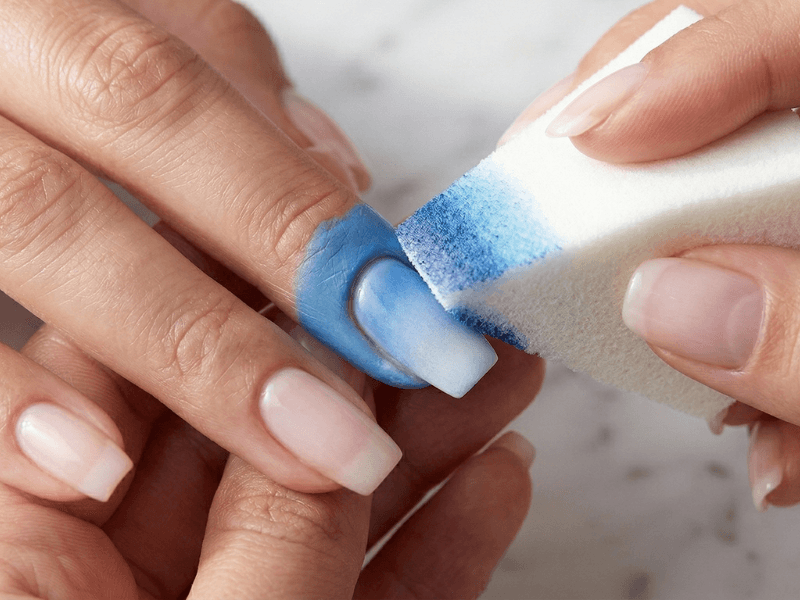
Step 4: Dab the Sponge onto Your Nail
Press the painted sponge edge firmly onto your nail and dab gently up and down in a heartbeat rhythm — dab, dab, dab. Never swipe side to side, as this smears rather than blends the colours.
Move the sponge slightly up and down as you dab to blur the line between the two colours. This dabbing motion is the entire secret behind sponge ombre nails that look professionally done.
Step 5: Build Up With Multiple Layers
Let the first layer dry for 60 seconds, then repeat the sponge dabbing process a second and third time. Each layer of your DIY ombre nails builds colour intensity and deepens the gradient effect.
⚠️ Your first dab will look sheer and patchy — that is completely normal. Three layers minimum is the rule for full, rich colour.
Step 6: Apply the Top Coat Blur Tool
While the gradient is still slightly tacky, apply a thick layer of high-gloss top coat over the entire nail. Think of this as Photoshop’s blur filter in a bottle — it visually melts both colours together, smoothing out visible dots and delivering the flawless, seamless finish that makes ombre nails at home with a sponge look truly professional.
Step 7: Remove Latex and Clean Up
Peel off the liquid latex (deeply satisfying), or remove the tape. Use a cleanup brush dipped in acetone to neaten any remaining edges. Apply a final layer of top coat to seal everything completely.

3. Pro Tips for Salon-Quality ombre Nails at Home
These small adjustments make the biggest difference in your sponge gradient nail results:
- 💧 Dampen the Sponge First — Lightly wet your sponge and wring it out before adding polish. A damp sponge won’t absorb your product, meaning more colour reaches your nail
- 🔁 Repaint the Sponge Each Nail — Fresh polish on the sponge for every finger keeps colours vivid and the gradient crisp
- ✂️ Trim the Sponge Small — Cut your sponge to match your nail width for precise application with less skin mess
- 🖤 Try the Matte Twist — A matte top coat over finished ombre nails creates a sophisticated velvet gradient look trending heavily in 2026
- 🌊 Blend the Middle More — Spend extra dabbing time at the centre where the two colours meet for the smoothest possible transition
4. Best Colour Combinations for ombre Nails at Home in 2026
| Look | Colours | Vibe |
|---|---|---|
| Sunset Fade | Coral → Orange → Gold | Warm, summery, editorial |
| Aura Nails | White → Lavender → Soft Pink | Dreamy, ethereal, trending |
| Ocean Gradient | White → Baby Blue → Deep Navy | Cool, fresh, minimal |
| Rose Gold Fade | Nude → Dusty Pink → Rose Gold | Romantic, luxe, timeless |
| Smoky Drama | Light Grey → Charcoal → Black | Edgy, modern, striking |
| Spring Bloom | Mint → Lilac → Soft White | Fresh, delicate, feminine |
5. ombre Nails at Home vs. Salon — Is It Worth Doing Yourself?
| Factor | DIY ombre Nails at Home | Salon |
|---|---|---|
| Cost | $2–5 (sponge + polish) | $40–80 per visit |
| Time | 15–20 minutes | 1–2 hours with travel |
| Quality | Salon-level with practice | Consistent every time |
| Convenience | Anytime, anywhere | Appointment needed |
| Creativity | Unlimited colour freedom | Menu-limited |
The verdict? Once you master ombre nails at home with a sponge, you’ll never pay salon prices for a gradient again.
Frequently Asked Questions About ombre Nails at Home
Q: What sponge is best for ombre nails at home?
A dense cosmetic wedge sponge is ideal for DIY ombre nails. The denser the sponge, the softer the gradient blur. Avoid bath sponges or loofahs.
Q: Why does my ombre look patchy?
You need more layers. The first sponge application always looks sheer — apply 2–3 layers, letting each dry 60 seconds between applications, for full, rich colour.
Q: Can I do ombre nails with a sponge on gel polish?
Yes. Apply gel polish to the sponge, dab onto cured gel base, then cure each layer under your UV/LED lamp. The sponge gradient technique works identically with gel.
Q: How long do ombre nails last at home?
With quality base coat and top coat, 7–10 days is realistic. Refreshing your top coat every 2–3 days extends the wear significantly.
Q: How many colours can I use for gradient nails?
Two colours is perfect for beginners mastering ombre nails at home with a sponge. Three colours work beautifully once you’re comfortable with the technique.

Udeshika
Nail Art Expert & Founder, BlueBeek 💅
Udeshika is a professional nail artist with 7+ years of experience creating salon-quality nail art at home. She founded BlueBeek to help beginners master nail art without expensive salon visits.
Related Guides You’ll Love
- 👉 Easy Nail Art for Beginners: 5 Step-by-Step Designs
- 👉 Glass Nails at Home: The Complete 2026 Guide
- 👉 Chrome Powder Nails at Home: Mirror Finish Guide
- 👉 Velvet Cat Eye Nails: Master the 2026 Trend at Home