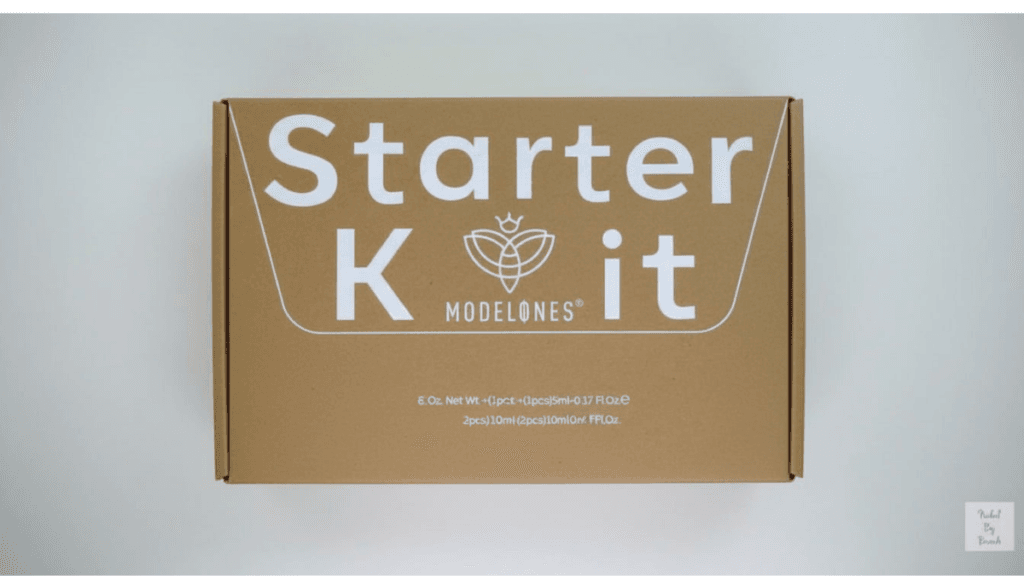
⭐ BlueBeek Rating: 4.8/5 | 📅 Tested in: February 2026 | ✍️ By Udeshika
⏱️ The Quick Verdict
If you are tired of weak mini lamps that leave your gel sticky, this kit is the perfect solution. The standout feature is the professional-grade 48W UV/LED lamp, which cures extensions perfectly every time.
The Pros:
- IIncredible 48W lamp with motion sensors
- Complete beginner set (includes tools + glitter top coat)
- Two types of dual forms (curved & straight)
- Beautiful nude/white color palette
The Cons:
- No slip solution included (you will need rubbing alcohol)
- Slight learning curve for molding the gel.
Modelones Polygel Kit Review 2026: The Ultimate 48W Power Test!
Hey nail lovers, welcome back to BlueBeek! I’m Udeshika, and I am on a mission to find the absolute best DIY nail products that actually work at home. Today, I am incredibly excited because I am reviewing an upgraded version of a beginner favorite.
Salons are expensive, we all know it. So, when I saw that Modelones released a comprehensive starter kit—featuring a professional-grade 48W nail lamp—I knew I had to put it to the test. This isn’t just a basic set; it promises a salon-quality experience right in your living room.
But is it actually easy to use for a complete beginner? How strong is that lamp? In this honest review, I’m breaking down the formula, the unboxing, and a step-by-step application guide to ensure that you can confidently create beautiful nails at home. Let’s dive in!
In This Article
- What’s Inside the Kit? (Upgraded Unboxing)
- 48W Power: Let’s Talk About the Lamp
- How to Use It: A Beginner’s Step-by-Step Guide
- Tips for a Long-Lasting 2+ Week Manicure
- How to Remove Polygel Nails
- Final Verdict: Is this the Best Kit in 2026?
- Frequently Asked Questions
What’s Inside the Modelones Polygel Kit? (Upgraded Unboxing)
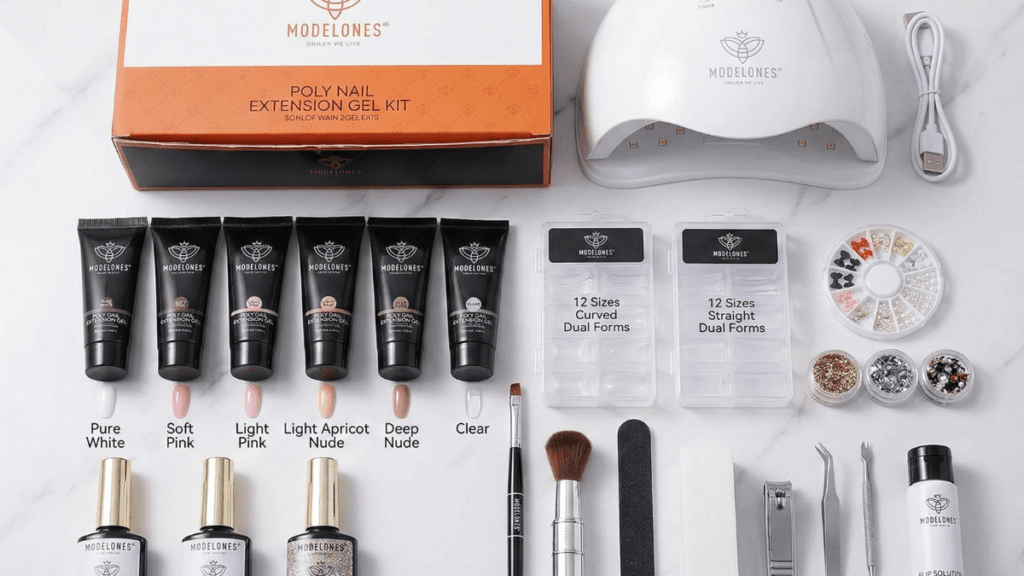
I have tested many kits, but this one is truly packed with value. When you are looking for the best at-home nail extension kit, it all comes down to the quality of the included tools. Here is every single item you get:
- Professional 48W UV/LED Nail Lamp: A game-changer with automatic sensors and 3 timer settings (30s, 60s, 90s).
- 6 Polygel Colors (15g each): A beautiful, diverse palette featuring Pure White, Soft Pink, Light Pink, Light Apricot Nude, Deep Nude, and Clear.
- 7ml Base Coat & Top Coat Set: Essential for perfect adhesion and a glossy finish.
- 15ml Glitter Top Coat: An amazing addition for creating sparkly, eye-catching nail art.
- Brush and Spatula Dual Tool: For slicing and molding the gel.
- Curved & Straight Dual Forms (12 Sizes each): You get two types of molds for total customization of your nail shape.
- 3D Nail Charms & Pearls: Cute bow charms and flatback pearls for instant nail art.
- Nail Glitter & Gems: For adding that extra bling.
- Pro Tools: Nail File, Nail Buffer, Nail Cutter, Tweezer, Cuticle Fork, and a Nail Dust Brush Pen.
ALL IN ONE: Modelones 48W Polygel Kit on Amazon
48W Power: Let’s Talk About the Lamp
The absolute star of this Modelones polygel kit review is the inclusion of the 48W nail lamp. Most starter kits include a small, weak 6W foldable lamp that takes a very long time to cure.
This 48W lamp is a professional powerhouse. It cures the gel exceptionally fast and features an automatic sensor—it turns on when you put your hand in and off when you take it out.
Modelones recommends the 30s-60s settings for thinner layers and the 60s-90s setting for thicker polygel applications to ensure a thorough, full cure. It is a massive time-saver.
How to Use Modelones Polygel Kit: A Beginner’s Step-by-Step Guide
Don’t be intimidated! Despite all the tools, this kit is easy to use. The instructions are detailed and yet very simple to understand. Here is my foolproof process:
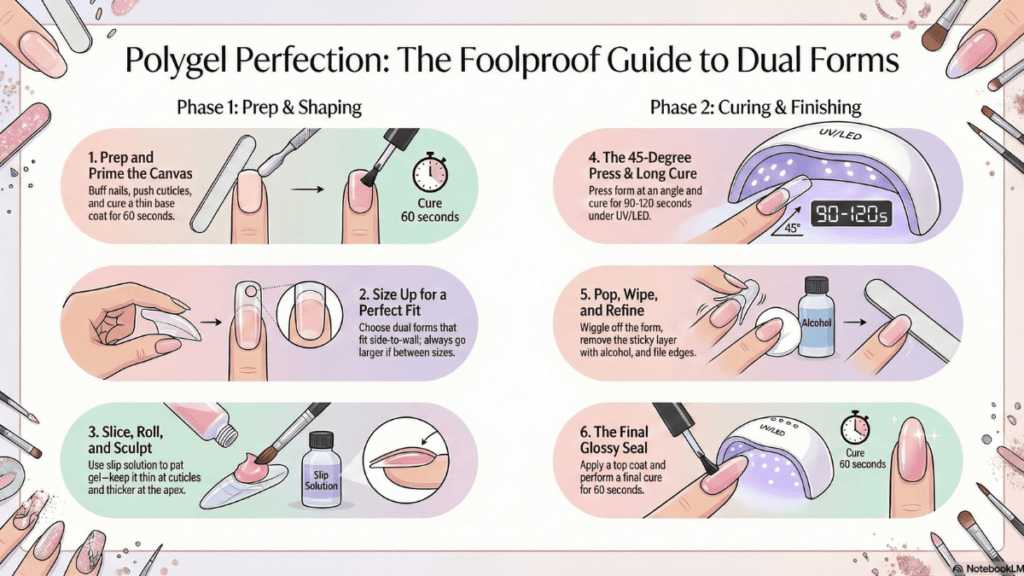
- Prep and Prime: Start with proper nail prep (filing, buffering, and cleaning). Apply the 7ml Base Coat and cure for 30 seconds under the powerful 48W lamp.
- Pick Your Form: Choose from the 12 sizes of Curved or Straight Dual Forms. This is a massive feature of this kit!
- Slice and Mold: Use the Spatula to slice a small bead of polygel (like Soft Pink or Clear) and roll it into the form. Dip the Brush lightly into slip solution (not included, but rubbing alcohol works!) to smooth and mold the gel evenly.
- Press and Cure: Gently press the form onto your nail. Use the 30-60s timer setting for thinner polygel layers, and the 60s-90s setting for thicker layers to guarantee thorough curing.
- Finish and Shine: Once cured, wiggle and pop the dual form off. Use the Nail Cutter and Nail File to shape the extension. Buff the surface.
- Seal the Deal: Apply the Base Top Coat set or the Glitter Top Coat and do a final cure for 60 seconds for an incredible high-shine finish.
(Pro Tip: You can then use the Tweezer and Cuticle Fork to add the 3D multi-shape bow charms, flatback pearls, and gems for a custom look!)
Long-Lasting Effect Tips: How to Make it Last 2+ Weeks
Is polygel durable? Yes. With proper nail prep, the Modelones polygel nail kit with u v light will last up to 2 weeks or longer.
To ensure better adhesion and prevent lifting (the gel pulling away from the nail bed), I highly recommend applying a nail dehydrator and primer before the base coat. When your natural cuticle area grows, you can easily “refill” your nails about every two weeks. (For a deep dive into prevention, check out my ‘Why Polygel Nails Lift’ guide.
How to Remove Polygel Nails (Quick Tips)
If you want to change your style or remove the gel, you can use the Nail File to file the builder gel down and then buffer it. Modelones recommends using a nail drill machine to save time and remove the nails in a cleaner, faster manner.
Modelones Polygel Kit: Pros & Cons (The 48W Edition)
The Pros:
- The 48W Lamp is Incredible: This powerful lamp with sensors and multiple timers is a game-changer. No more soft, uncured gel!
- Truly “Everything” for Beginners: From a nail cutter to glitter top coat, this is a complete solution.
- 2 Types of Dual Forms: Getting both curved and straight forms allows for perfect customization.
- Beautiful Nude & White Palette: The 6 colors are sophisticated, durable, and odorless.
- Detail and Simple Instructions: Makes the kit easy to use, even for your first attempt.
The Cons:
- No Slip Solution: While a minor detail, you will need to purchase slip solution or use rubbing alcohol separately.
- Learning Curve: As with all polygel, mastering the “pat and smooth” technique takes one or two tries.
Final Verdict: Is this the Best Polygel Kit for Beginners with everything in 2026?
A resounding YES.
The upgraded Modelones Polygel Kit Review shows that this is not just a starter kit; it’s a professional home nail system. The formula is easy to apply, the color selection is sophisticated, and the inclusions are unmatched.
But the true star is that powerful 48W nail lamp. It solves the #1 problem of beginner kits—weak lamps that lead to uncured, messy nails. If you are serious about DIY extensions, this is the best investment you can make.
Ready to try the 48W difference? Get your complete Modelones 48W Polygel Kit on Amazon today!
Frequently Asked Questions
How long does polygel vs acrylic last? Polygel can last 2+ weeks, similar to acrylics. However, polygel is more flexible and causes minimal damage to your natural nails.
Does this Modelones kit require slip solution? Yes. Slip solution prevents the gel from sticking to your brush. While not included, high-percentage rubbing alcohol is a common and easy alternative.
How strong is the UV lamp in the Modelones kit? This kit includes a very efficient 48W UV/LED lamp. This is a massive upgrade over the 6W lamps in typical starter kits and ensures a fast, thorough cure for all types of polygel.
Can I use regular polish over the Modelones polygel extensions? Yes. Once your polygel is cured, filed, and buffed, you can apply regular polish or gel polish over the top.
Do you have any other questions about getting started with the 48W Modelones kit? Drop them in the comments below! 📌 Pin it · 💬 Comment your thoughts · 💅 Tag us @bluebeek

Udeshika
Nail Art Expert & Founder, BlueBeek 💅
Udeshika is a professional nail artist with 7+ years of experience creating salon-quality nail art at home. She founded BlueBeek to help beginners master nail art without expensive salon visits.